


How to insert and remove a scutching tool attachment?
How to insert and remove a scutching
|
||||
|
|
||||
Insert a scutching tool attachment |
||||
 |
Step 1 – Place attachment in holderInsert the edge of the scutch comb/drove into the scutch comb holder (the groove on the end of the scutch chisel/hammer). Make sure that the scutch comb is fitted directly in the centre of the scutch comb holder so it doesn’t slip around. |
|||
 |
Step 2 – Push until ridge rests on lipPush the scutch comb/drove into the scutch comb holder until the ridge rests on the lip of the scutch chisel/hammer. The shape of the holder and comb/drove fit together perfectly to ensure that the comb/drove stays in a secure position. |
|||
 |
||||
 |
Step 3 – Use scutching toolUse the scutch chisel/hammer as normal. |
|||
Remove a scutching tool attachment |
||||
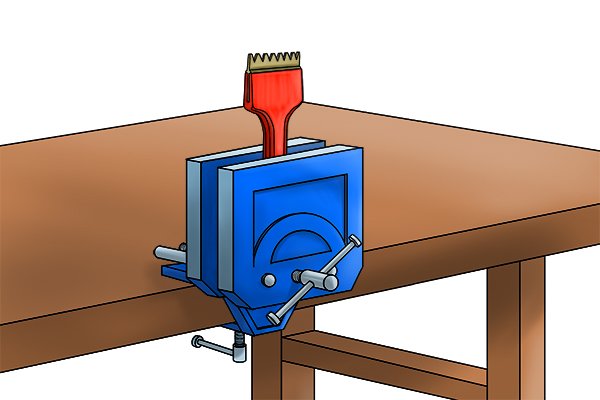 |
Step 1 – Place tool in vicePlace the scutching tool into a vice to hold it in a secure position. |
|||
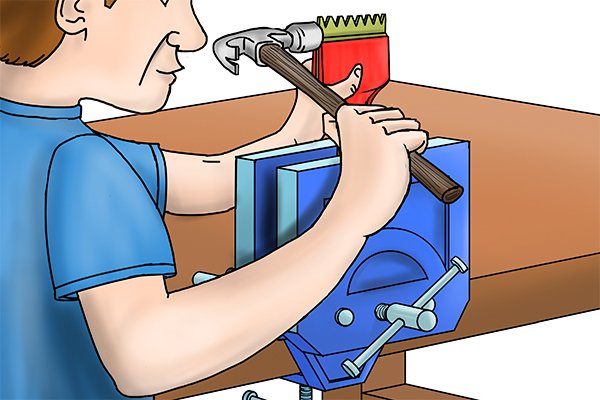 |
Step 2 – Knock attachment outUsing a hammer, knock the scutch comb/drove out of the holder sideways. |
|||
 |
Step 3 – Flip attachment overFlip the scutch comb/drove over so that the spare sharp edge becomes the new cutting edge. Finally, remove the scutching tool from the vice and insert the now blunt end into the scutch chisel/hammer by following the steps above. |
|||
