Our other sites:

How to fit a clip-on gas regulator?

How to fit a clip-on gas regulator?

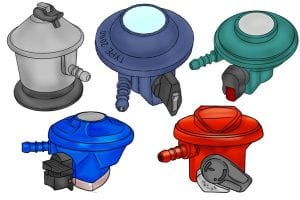
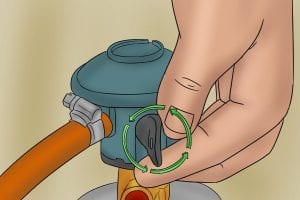
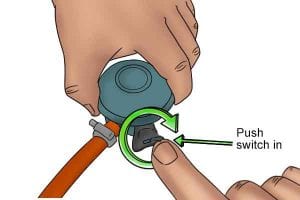
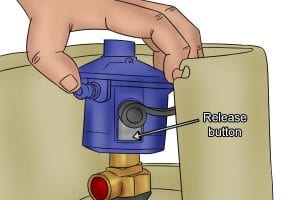
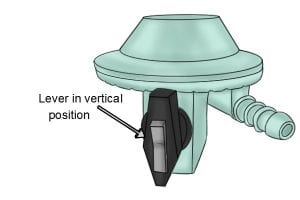
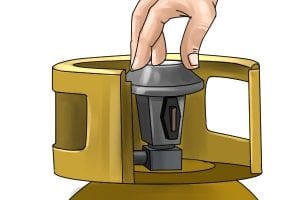
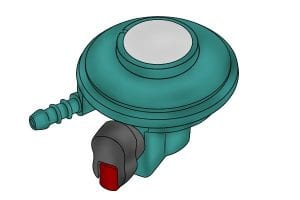
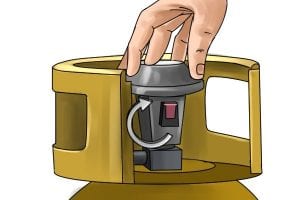
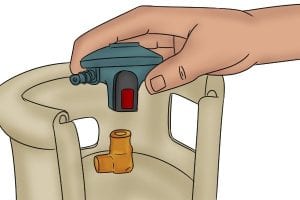
There are many types of clip-on regulator on the market. The clip mechanisms vary in design, with some easier to use than others, but they all fit directly on to the valve at the top of the cylinder. 


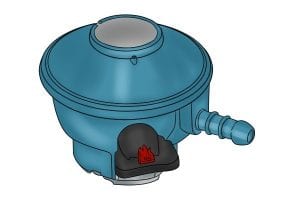
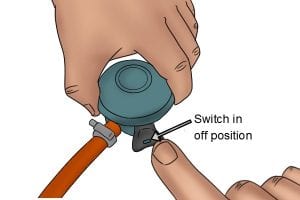
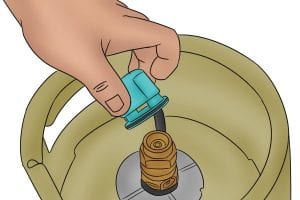
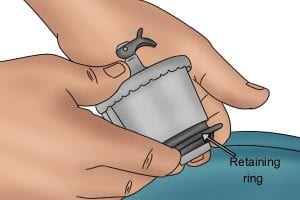
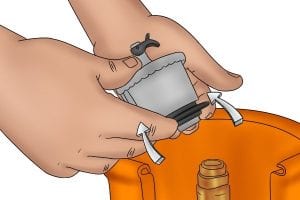
Before you fit any clip-on regulator, make sure the hose is in good condition and is securely attached, then turn the regulator upside down to check that it’s clean inside. 


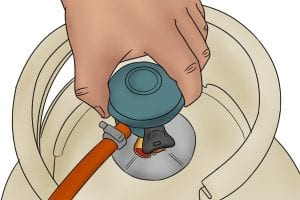
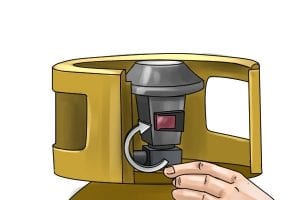
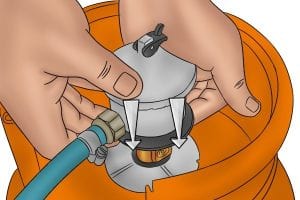
You also need to inspect the valve on top of the cylinder to make sure it’s clean and free from any grease or debris.


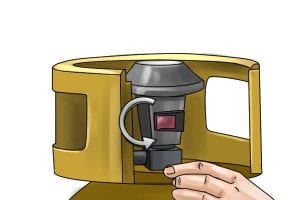
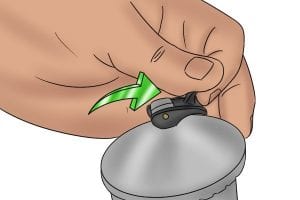
Always check the connection between the hose and the regulator with a leak detector spray before using your appliance.

Fitting a Clip-On Regulator With a Switch

This design of the regulator has a switch on the front that controls both the gas flow and the locking mechanism that fixes it to the cylinder. It’s one of the easiest types to use.

Step 1 - Check Gas Regulator is Off

Make sure that the green marker on the switch is facing upwards, showing the regulator is turned off, then push the switch in.


This releases a locking mechanism under the regulator, allowing you to fit it on to the valve.

Make sure that the green marker on the switch is facing upwards, showing the regulator is turned off, then push the switch in. This releases a locking mechanism under the regulator, allowing you to fit it on to the valve.

Step 2 - Attach Regulator

Press the regulator carefully on to the cylinder valve, then let go of the switch to lock it in place. Pull gently upwards on the regulator to make sure it’s securely attached to the valve.


You’ll find that the regulator and hose are still able to swivel from side to side, but that’s perfectly normal. The main thing is that the regulator mustn’t be able to move up and down.

Step 3 - Turn on Gas

To switch the gas on, turn the regulator switch anti-clockwise until the red flame symbol is facing upwards. Now you can start using your appliance.

To switch the gas on, turn the regulator switch anti-clockwise until the red flame symbol is facing upwards. Now you can start using your appliance.


Removing a Clip-On Regulator With a Switch

Step 1 - Turn off Gas

When you’ve finished using your appliance and want to remove the regulator, turn off the gas by moving the switch clockwise back to the off position. The green symbol will now be at the top.


Press the switch inwards, then you’ll be able to easily pull the regulator off the cylinder valve.

When you’ve finished using your appliance and want to remove the regulator, turn off the gas by moving the switch clockwise back to the off position. The green symbol will now be at the top.


Press the switch inwards, then you’ll be able to easily pull the regulator off the cylinder valve.


Step 2 - Replace Cap

Always remember to replace the protective dust cap on the cylinder valve when you’ve finished, otherwise, it could get dirty, wet or damaged.

Always remember to replace the protective dust cap on the cylinder valve when you’ve finished, otherwise, it could get dirty, wet or damaged.


Fitting a Clip-On Regulator With Level

This design of regulator uses a lever which you rotate up and down to switch the gas supply on and off.


There is a separate release button under the lever which controls the locking mechanism.

Step 1 - Push Down Regulator

Before fitting the regulator, make sure the lever is horizontal, in the 3 o’clock position. This ensures it is switched off.


Push the regulator firmly down on to the cylinder valve until you hear it click into place.

Before fitting the regulator, make sure the lever is horizontal, in the 3 o’clock position. This ensures it is switched off.


Push the regulator firmly down on to the cylinder valve until you hear it click into place.

Step 2 - Turn Gas On

To switch the gas supply on, turn the lever anti-clockwise until it’s upright, in the 12 o’clock position.

To switch the gas supply on, turn the lever anti-clockwise until it’s upright, in the 12 o’clock position.

Removing a Clip-On Regulator With Level

Step 1 - Turn Off Gas

When you’ve finished using your appliance and want to remove the regulator, turn the lever back to the horizontal position to shut off the gas flow.

When you’ve finished using your appliance and want to remove the regulator, turn the lever back to the horizontal position to shut off the gas flow.

Step 2 - Lift Regulator Off

Press inwards on the metal button just below the lever. This will release the internal catch, then you’ll be able to lift the regulator off the valve.

Press inwards on the metal button just below the lever. This will release the internal catch, then you’ll be able to lift the regulator off the valve.

Fitting Three-Way Regulator With Rocker Switch

Some older style regulators are operated with a three-way lever that controls both the gas supply and the locking mechanism.

Step 1 - Check Regulator is Off

Make sure the lever is in a vertical position with the pointed tip facing downwards.

Make sure the lever is in a vertical position with the pointed tip facing downwards.

Step 2 - Attach Regulator

Push the regulator firmly down on to the cylinder valve.

Push the regulator firmly down on to the cylinder valve.

Step 3 - Lock Regulator

To lock the regulator into place, turn the lever clockwise until it’s in a horizontal position and check it’s secure.

To lock the regulator into place, turn the lever clockwise until it’s in a horizontal position and check it’s secure.

Step 4 - Turn On Gas

Turn the lever clockwise again until the pointed tip is facing upwards. This will open the gas supply.

Turn the lever clockwise again until the pointed tip is facing upwards. This will open the gas supply.

Removing Three-Way Regulator With Rocker Switch

Step 1 - Turn Off Gas

Turn the lever fully anti-clockwise until horizontal to turn the gas supply off. A ‘stop’ mechanism will prevent the lever from turning further than this.

Turn the lever fully anti-clockwise until horizontal to turn the gas supply off. A ‘stop’ mechanism will prevent the lever from turning further than this.

Step 2 - Remove Regulator

To turn the lever further to remove the regulator from the cylinder, press down the rocker switch to disengage the ‘stop’.


This will allow you to turn the lever to the vertical position and then remove the regulator. Keep the rocker depressed while turning the lever.

To turn the lever further to remove the regulator from the cylinder, press down the rocker switch to disengage the ‘stop’.


This will allow you to turn the lever to the vertical position and then remove the regulator. Keep the rocker depressed while turning the lever.

Fitting Three-Way Regulator With Rocker Switch

More modern three-way regulators feature a release tab, or button, which replaces the brass rocker switch on the lever.

Step 1 - Check Regulator is Off

Make sure the lever is in a vertical position, with the red tab pointing downwards.

Make sure the lever is in a vertical position, with the red tab pointing downwards.

Step 2 - Attach Regulator

Push the regulator down on to the cylinder valve.

Push the regulator down on to the cylinder valve.

Step 3 - Lock Regulator

Give the lever a quarter turn clockwise until it’s horizontal, with the red tab pointing to the left.

Give the lever a quarter turn clockwise until it’s horizontal, with the red tab pointing to the left.

Step 4 - Turn on Gas

To open the gas supply, pull the red tab outwards then twist the lever clockwise again until it’s in a vertical position, with the tab pointing upwards.

To open the gas supply, pull the red tab outwards then twist the lever clockwise again until it’s in a vertical position, with the tab pointing upwards.

Removing Three-Way Regulator With Rocker Switch

Step 1 - Turn Off Gas

To switch off the gas flow, pull the red tab outwards and turn the lever anti-clockwise until it’s horizontal again, with the tab facing to the left.

To switch off the gas flow, pull the red tab outwards and turn the lever anti-clockwise until it’s horizontal again, with the tab facing to the left.

Step 2 - Lift Regulator Off

Twist the lever anti-clockwise until the red tab is at the bottom again, then you can pull the regulator off the valve.

Twist the lever anti-clockwise until the red tab is at the bottom again, then you can pull the regulator off the valve.

Fitting a Regulator With a Retaining Ring

Not all clip-on regulators have a lever. Some lock on to the cylinder valve using a round disc at the base called a retaining ring.

Step 1 - Check Regulator is Off

Flick the switch on top of the regulator to the off position to make sure no gas can start flowing until you’re ready to use the appliance.

Flick the switch on top of the regulator to the off position to make sure no gas can start flowing until you’re ready to use the appliance.

Step 2 - Unlock Regulator

Pull up the retaining ring on the base of the regulator.

Pull up the retaining ring on the base of the regulator.

Step 3 - Attach Regulator

Press the regulator firmly into position on the cylinder valve and push the retaining ring back down to lock it into place.

Press the regulator firmly into position on the cylinder valve and push the retaining ring back down to lock it into place.

Step 4 - Turn On Gas

Flick the switch on top of the regulator to the on position.

Flick the switch on top of the regulator to the on position.

Removing a Regulator With a Retaining Ring

Step 1 - Turn Off Gas

When you’ve finished using your appliance, turn the regulator switch to the off position to stop the gas flow.

When you’ve finished using your appliance, turn the regulator switch to the off position to stop the gas flow.

Step 2 - Lift Regulator Off

Squeeze up on the retaining ring to operate the release mechanism, then pull the regulator off the cylinder valve. Remember to replace the dust cap.

Squeeze up on the retaining ring to operate the release mechanism, then pull the regulator off the cylinder valve. Remember to replace the dust cap.

Wonkee Donkee Tools
Logo