How to remove plain tiles using a wrecking bar? |
||||
| Shop for Wrecking Bars | ||||
How to remove an unnailed plain tile |
||||
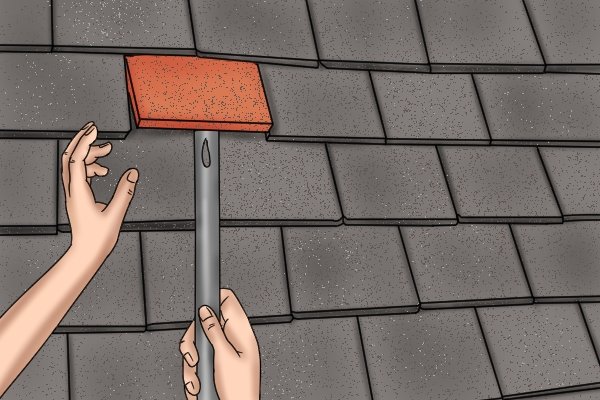 |
Step 1 – Insert wrecking bar beneath tileInsert the tip at the straight end of your wrecking bar beneath the edge of the tile you will be removing and lift slightly. |
|||
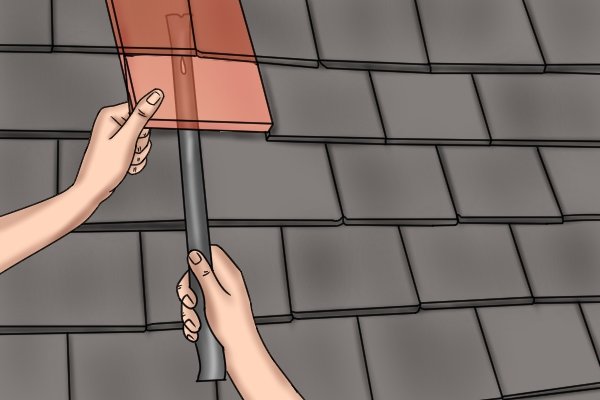 |
Step 2 – Push wrecking bar beneath tile fullyWhile holding the tile up slightly with your free hand to make room for your wrecking bar, push the bar beneath the tile as far as possible. You should aim for the straight claw of your wrecking bar to sit beneath the top third of the tile. |
|||
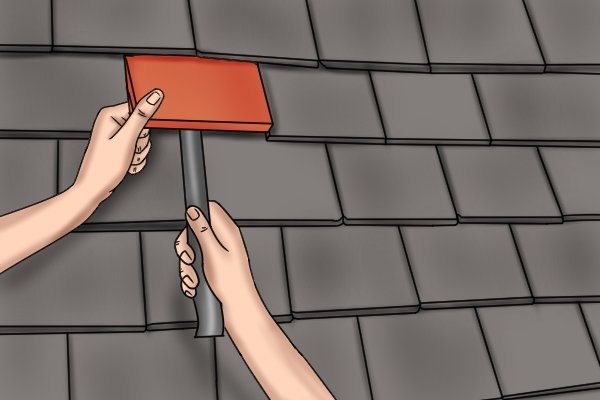 |
Step 3 – Lever tile upwardWith the straight claw of your wrecking bar resting beneath the top third of the tile, apply pressure to the opposite end. This will lever the top third of the tile off the roof batten underneath, and enable you to lift the tile lug from behind the lath. |
|||
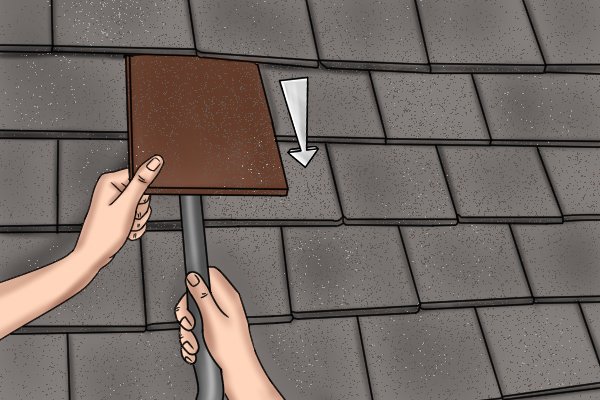 |
Step 4 – Pull tile freeUsing your hands, and supporting the weight of the tile on your wrecking bar, pull the tile out from underneath the above tiles, and remove from roof. |
|||
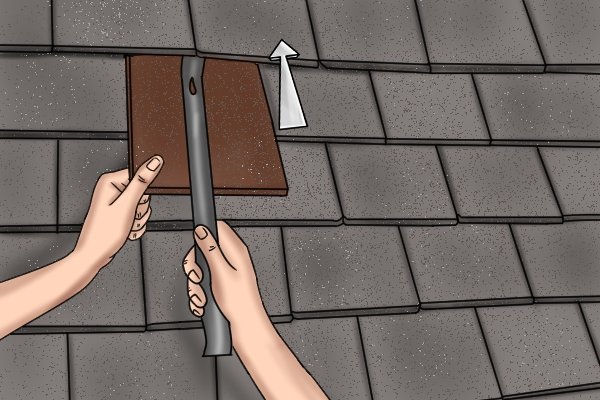 |
Step 5 – Replace tileUsing your wrecking bar, lift the tiles which previously overlapped the top of the tile you have removed, and slide your removed tile (or replacement tile) back underneath the overlapping tiles until the lugs on the top edge of the tile slot into place behind the lath beneath. |
|||
How to remove a nailed plain tile |
||||
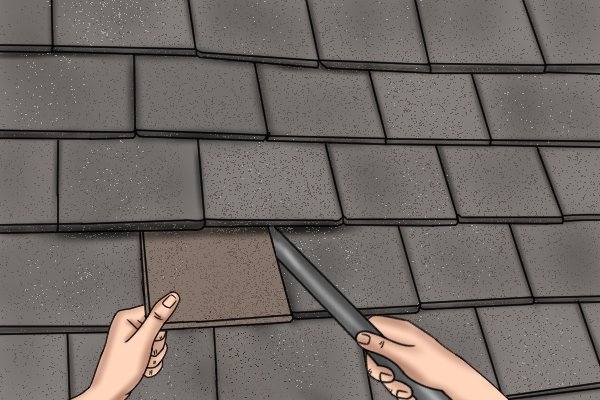 |
Step 1 – Insert wrecking barFirst, gently slip the tip of your wrecking bar’s straight claw underneath one side of the tile you will be removing. |
|||
 |
||||
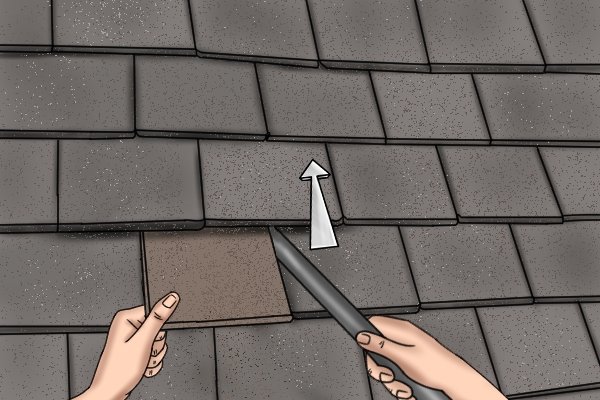 |
Step 2 – Push bar beneath tileNow, carefully push the straight claw of your wrecking bar forwards, aiming for the top edge. |
|||
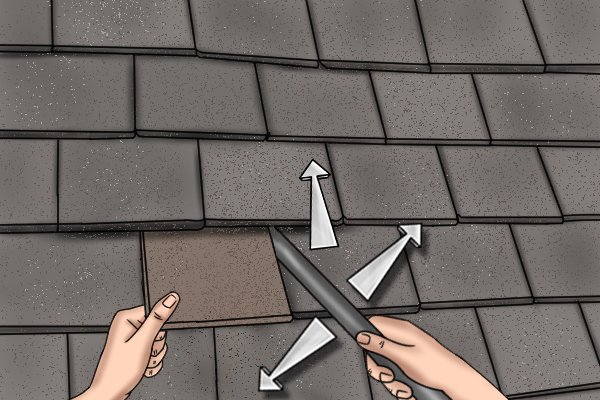 |
Step 3 – Apply gentle forceAs you push your bar forward, begin a gentle, up and down rocking motion by alternately pushing down on and releasing the opposite end of the bar. At the same time, continue to ‘creep’ toward the top edge of the tile with your wrecking bar. |
|||
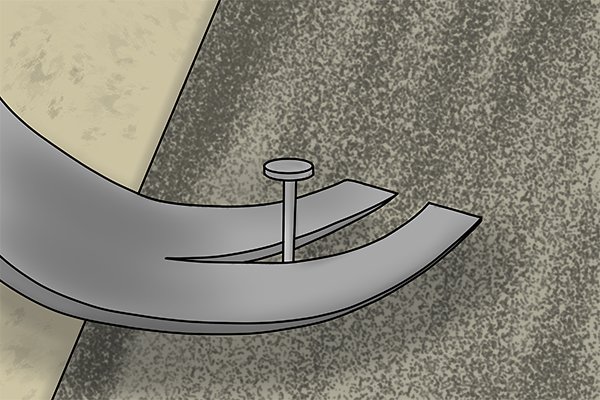 |
Step 4 – Remove nailBe patient! Your wrecking bar’s gentle rocking motion will gradually free up the nails in the top corners of the tile, without damaging the tiles above or beneath the one you are removing. |
|||
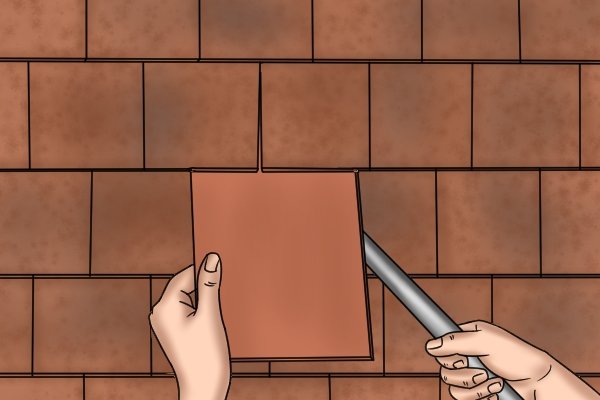 |
Step 5 – Remove tileWhen the nails have been freed, you will be able to slide the tile out easily. Both nails will come with it, so you needn’t worry about finding them. |
|||
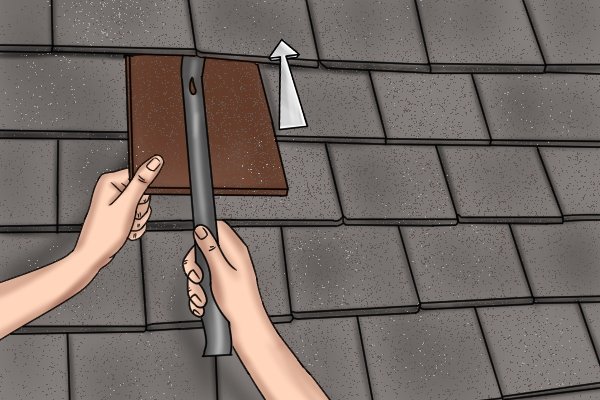 |
Step 6 – Replace tileUsing your pry bar, lift the tiles which previously overlapped the top of the tile you have removed, and slide your removed tile (or replacement tile) back underneath the overlapping tiles until the lugs on the top edge of the tile slot into place behind the lath beneath. |
|||
How to fit a plain tile which is slightly too wide for its seating? |
||||
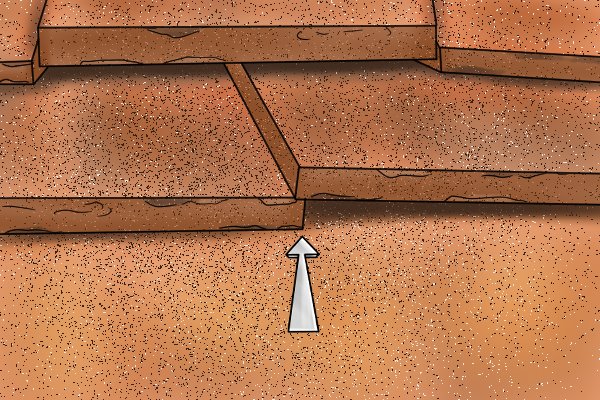 |
Sometimes, and particularly when installing handmade clay tiles, it may be the case that your replacement tile does not fit the space left by the removed tile exactly. | |||
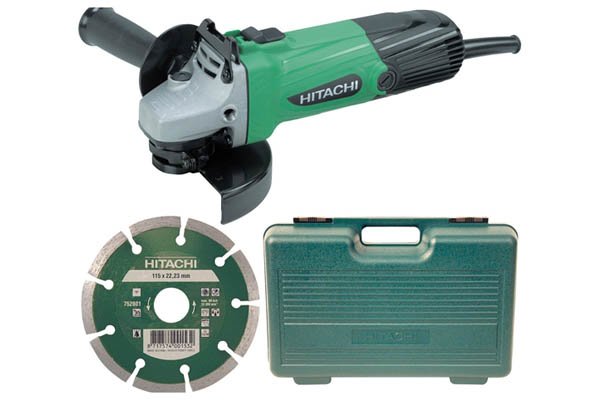 |
If your replacement tile is too small for its seating, you will need to cut a portion from an extra tile to fill the gap, using a mechanical tool such as an angle grinder with a masonry cutting disc. | |||
 |
The good news is that if the tile you are installing is too wide for the gap, there is an easy fix! | |||
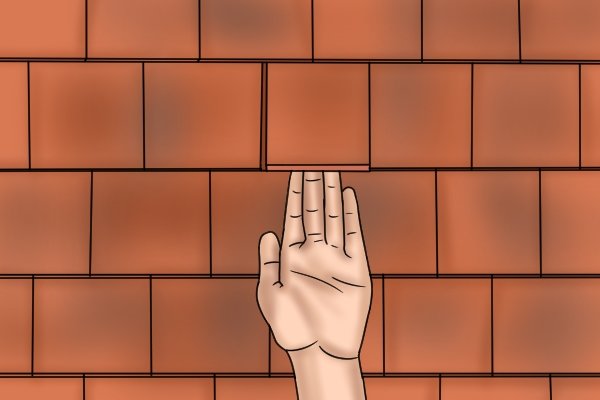 |
Step 1 – Lift tile slightlyUsing your free hand, lift the front edge of the new tile gently upwards. |
|||
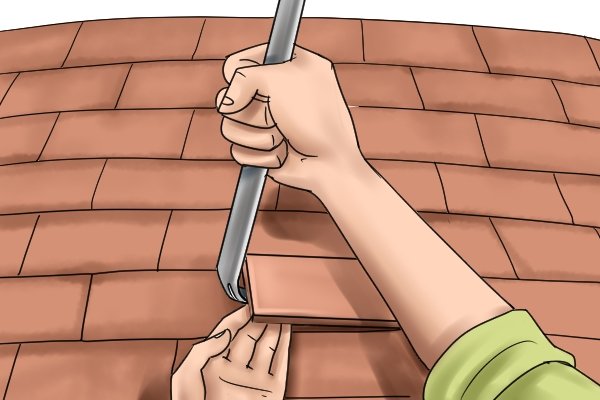 |
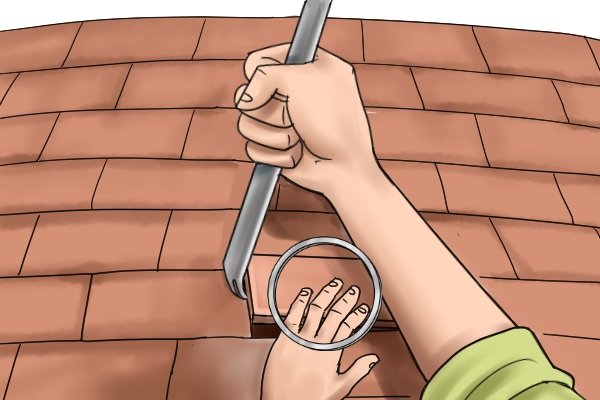
Step 2 – Insert wrecking bar between tilesNow, insert the straight claw of your wrecking bar gently between either the left or right edge of the new tile and the tile next to it, with the heel in contact with the original tile, and the top of the claw in contact with the new tile. |
|||
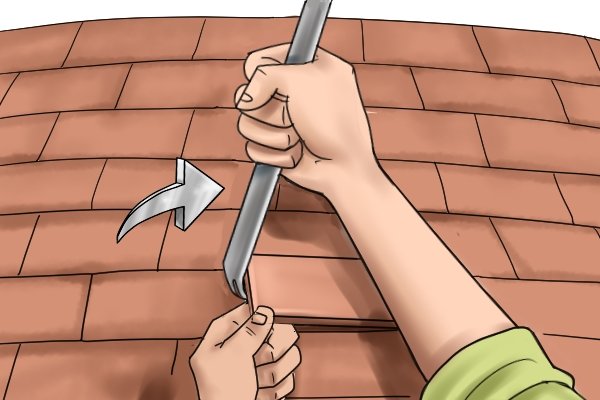 |
Step 3 – Apply gentle forceApply pressure to your wrecking bar by pushing the opposite end toward the new tile, causing the heel of the bar to push back against the original tile. |
|||
 |
Step 4 – Position opposite cornerPush the bottom corner at the opposite edge of the new tile into place, so that it no longer overlaps the corner of the tile opposite. |
|||
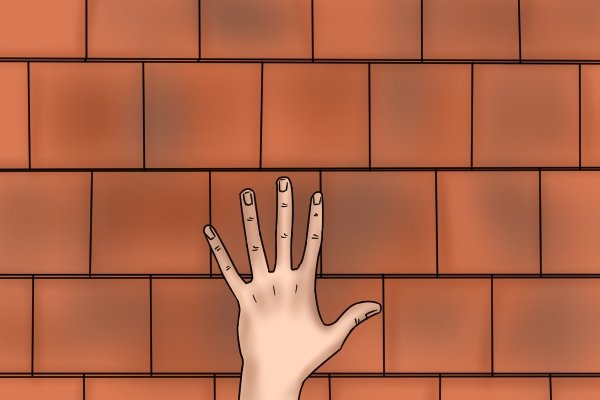 |
Step 5 – Slot tile into placeThe new tile should now slot into place between the two original tiles on right and left. |
|||
 |
Problem solved! | |||


