


How to level ground coverings with a rake?
How to level ground coverings with a rake |
||||
|
|
||||
 |
There are various reasons why you might need to level off a ground covering. If you’re laying out a patio or building a shed the ground will need to be level before you start. Also, areas you want to plant in will be easier to work with if they are levelled off first. Unless the ground is dramatically uneven or there are some major obstacles, such as giant stones, you should be able to level the ground yourself, with a rake. | |||
 |
You can use a water level to check how level a large surface area is. A water level uses water in a long, thin tube to check the level between two distant points. | |||
 |
Another option is a long, straight beam of wood and a spirit level. The wood can be laid to cover a certain distance, and the spirit level can be placed on the beam to take measurements. The beam can be moved around the area to gauge which parts are higher or lower than the desired level. | |||
How to level small areas of ground for planting or reseeding |
||||
 |
If your garden has an area with a bump or depression, or your lawn has a bare spot, you can easily level it out and rake the area even. It’s also an opportunity to add nutrients to the soil, through compost or fertiliser, to create a more efficient area for planting. | |||
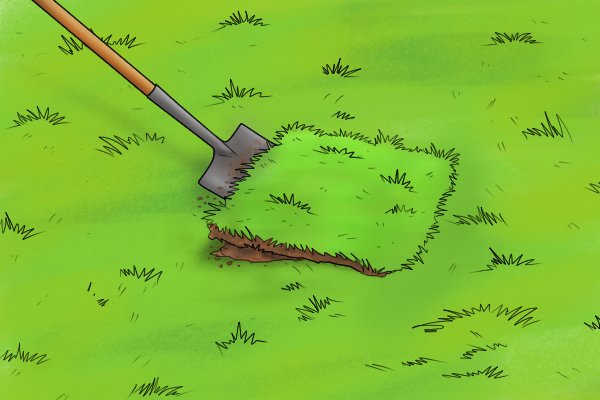 |
Step 1 – Dig out dirtDig the area which needs to be levelled. In soil, if there is a depression or bare patch it’s best to dig out the soil in the area to a depth of about 250mm (10″). For bumps, dig out the raised soil and then down a further 250mm (10″). This is so you can use fresh soil and add nutrients to create an even surface ready for planting in. |
|||
 |
Step 2 – Mix soil with compostAdd compost or another fertiliser to the soil you have removed and mix well. This will add nutrients to the soil. If you’re filling a depression you might need to add additional soil as well. Use this mixture to fill the hole to the appropriate height. |
|||
 |
Step 3 – Rake the areaUse a rake to level the coverings you’ve added. Stand with your legs apart and hold the rake with both hands. Comb the rake over the area you have just filled in until it is level with the rest of the ground. Use the flat edge of the rake to smooth the area. |
|||
 |
Step 4 – WaterWater the areas you have just filled and the surrounding area. This should make the soil settle. Add more soil if necessary, to ensure it is level, and rake over after every addition. The area should now be ready to plant in, or reseed if it’s a lawn or other grassy area. |
|||
How to level large areas of ground |
||||
 |
To prepare larger areas of ground for jobs like laying turf or paving, or for building sheds or conservatories, you need to have a large, level, compacted base surface. | |||
 |
Step 1 – Mark out area to be levelledIt is advisable to mark out the area you want to level, and ascertain the level you want to get the ground coverings too. You can mark out the area simply by placing markers, such as wooden stakes, at regular intervals. Set them at the same height with a level. If you need to, you can dig up the top layers of earth and remove any debris from the patch. Use a spade or garden fork to remove larger debris and rake the area to remove smaller debris. |
|||
 |
Step 2 – Determine how uneven ground isTo ensure the ground is completely level, you will need to check it with a water or spirit level. Using a level initially should help you determine how uneven the ground is and which parts need adjusting. A good way to check large areas with a spirit level is to use it with a long, straight beam. Or, you can use string held between two points, across the ground, and check that with a spirit level. |
|||
 |
Step 3 – Begin levellingUse the rake to move soil from high areas to the lower areas. Stand with one foot in front of the other, hold the rake with both hands, and sweep the ground materials towards you and away from you. Often you can judge roughly how level the area is by eye as you work, and check it later with a spirit level. |
|||
 |
Step 4 – Smooth groundOnce the ground is level you can use the flat side of the rake head to smooth the area over. Sweep the rake over the surface until it appears smooth. If the ground needs compacting you can carefully tread it down with your feet, or use the rake vertically, to tamp the soil with the head. For extra compaction of the ground you might need to get a tamper or roller to go over the area. |
|||
 |
Step 5 – Allow ground to settleIt is advisable to let the ground settle for a few weeks before you build anything on it. Once it has settled it can be checked again. If it is uneven after settling you will need to rake and smooth the area again. The area should then be ready for laying turf or building on. |
|||
