Our other sites:

How To Use A DeWalt Compact Drill Driver?

How to use a DeWalt Compact Drill Driver?

DeWalt Compact Drill Driver.

At Wonkee Donkee, we believe that before you use any power tools it is vitally important that you read and understand all of the functions and safety advice. Our number one tip is to always be safe when using any power tools and that includes wearing the appropriate personal protective equipment for the task!

Charge the Battery!

DeWalt battery charger used to make sure you charge the power tool battery.

For best results charge the batteries up fully before first use. Plug the charger into a suitable 230V outlet before sliding the battery pack into the base of the tool. A red light will start blinking, showing that charging has begun.


When charging is complete – which will take between 55 and 90 minutes, depending on battery capacity – the light will remain on continuously.

Inserting a Drill or Screwdriver Bit

Lock-Off Drill Driver

DeWalt hammer drill lock off.

Push the forward and reverse button into the central position. This activates the spindle lock, which shuts off the tool and allows you to adjust the chuck without the risk of injury.

Open Chuck Jaws

Turning Dewalt drill driver chuck anti-clockwise to unlock.

Hold the base of the chuck in one hand to steady the drill. With the other hand, turn the chuck’s collar in an anti-clockwise direction until its jaws open wide enough to accept the bit.

Insert Bit

Different chucks fit into drill bits.

Push the drill or screwdriver bit into the jaws of the chuck as far as it will go until you feel it engage.


Tighten it up by turning the chuck’s collar in a clockwise direction with one hand while holding the drill driver with the other until the jaws are clamped firmly around the bit.

Adjusting the Settings

Gear switches on drill drivers.

The gears in a drill driver serve the same purpose as the ones in a car. Selecting a low gear means the drill driver will operate at a slower speed but deliver more torque. If you put it in a higher gear it will operate at a faster speed but deliver less torque.


Choose a high gear for working on softer materials or smaller screws, when less torque is required. A low gear is best for drilling, and for working on tough materials or larger screws, when more torque is required.

Set Torque Control

Adjusting torque control on drills.

Find the arrow on top of the drill driver and rotate the numbered torque ring until the torque level you want is aligned with the arrow.


If the tool struggles to turn the screw, select a higher level of torque and try again. Drill drivers are powerful machines, so always start on a low setting and increase it only if necessary. See Tips on Torque Control for more details.

Set Forward or Reverse

Forward and reverse button to control the drill direction.

Push the forward/reverse button into the forward position to begin inserting screws or drilling. The reverse setting is for removing screws or backing out drill bits.

Tips on using the Drill Driver

Always use sharp drill bits and discard any that are damaged. When drilling wood, you can use:


Spade Bits


Twist Drill Bits


Hole Saws

When drilling metal, you can use:


HSS (High-Speed Steel) Twist Drill Bits


Hole Saws

Quick Tip

Top tips for using an angelr grinder from wonkee donkee.

When you’re drilling holes, make sure the torque adjustment collar is set so that the drill icon is precisely level with the centre line on top of the tool.


If it’s not lined up properly there is a danger that the clutch might slip while you’re trying to drill.

Starting a Compact Drill Driver

Variable Speed Trigger Switch.

Gradually squeeze the variable speed trigger until the chuck and bit start to turn. You can increase or reduce the speed to suit the task.


The further you squeeze the trigger, the faster the tool will go, but the less torque it will deliver. The more you release the trigger, the slower the tool will go, but the more torque it will produce.

Keep a Steady Pace

Use a slow speed to start the hole, then accelerate by squeezing the trigger harder when the hole is deep enough to drill without the bit skipping out.


However, for maximum tool life you shouldn’t use the variable speed option continuously – it’s meant for starting holes and driving screws.

Maintain a Firm Grip

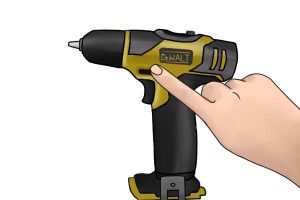
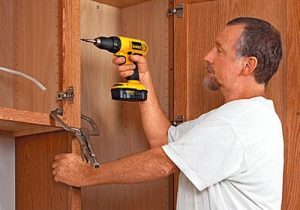
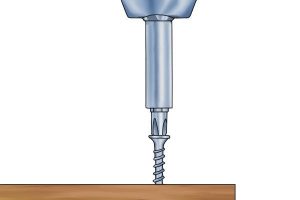
Hold the drill firmly, and make sure you always apply pressure in a straight line with the bit.


Let the weight of the tool do the work – use just enough pressure to keep the drill biting, but don’t push so hard that the motor stalls or the bit bounces off the surface.


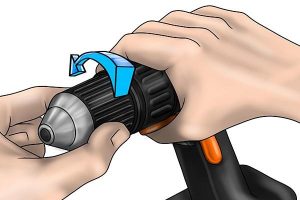
When you pull the bit back out of a drilled hole, keep the motor running to help prevent jamming

Less is More

Wonkee Donkee Guide Top Tips

When you’ve nearly finished drilling the hole, reduce the pressure on the tool and carefully ease the bit through the last few millimetres. This minimises the chance of the drill stalling or breaking through the material.


Finally, when you pull the bit back out of the hole you’ve just drilled, keep the motor running to help prevent jamming.

What to do if the drill stalls?

Caution signs warn others of danger.

Let go of the trigger immediately, pull the drill bit out of your workpiece and investigate what caused the motor to cut out. Stalling usually only happens if the tool is being overloaded or used for unsuitable tasks.


On no account should you start pulling the trigger in and out in an attempt to restart the motor, as this could seriously damage the drill.

Removing a Bit

Removing a bit from a chuck from a drill.

When you have finished working or need to change a bit, release the trigger to bring the drill driver to a halt.


To extract a bit, lock the chuck in the ‘off’ position and turn its collar anti-clockwise until the jaws open enough for you to pull out the bit.

Adjusting Torque

Setting the torque control on a drill.

As with drilling, choose your required speed and torque range using the gear shifter and torque adjustment collar. Choose a low gear for large screws or tough materials, and a high gear for small screws or softer surfaces.


Select the minimum torque level necessary to insert the screw to the required depth – the lower the number on the collar, the lower the torque output.

Extra control when drilling is provided with the inclusion of torque control.

Having inserted your screwdriver bit into the chuck, check whether you’ve got the torque setting right by making a few practice runs on bits of scrap or on parts of the workpiece that won’t be visible afterwards.


To avoid damaging your work or the screw head, always start with a low level of torque then increase it gradually if needed. 

Wonkee Donkee Tools
Logo