Our other sites:

How to fit and remove valve tails?

How to fit and remove valve tails?

Radiator Valve Tails.

Radiator valve tails are the devices that screw into the two bottom radiator tappings. They are connectors between the radiator and the valves that control the flow of water through the radiator.


You might need to change a tail to fit a new type of valve.

 If installing a replacement radiator, it may not fit the gap left by the old one so you might need to use a tail extension or a telescopic valve to bridge any gap on each side.

tail extension or a telescopic valves.

You can use any of the hexagon-shaped valve keys for tails with internal hexagons, and any of the keys with two grooves either side for tails with internal lugs or bayonet fittings. These include universal keys, Allen or hex keys, double-ended keys and combination wrench keys.

Step 1 - Drain system

The central heating system will have to be drained before a valve can be completely removed. You will need to connect a hose to a convenient downstairs drain valve in either a pipe or a radiator to do this. You may need a three-legged key to open the drain valve.


Draining is straightforward if you have a combi boiler system, which does not have a water cylinder. However, if you have a conventional water cylinder system, you may need professional help to do this.

Step 2 – Undo the union nut

With the system drained, remove the manual, thermostatic or lockshield valve that is joined to the tail you wish to remove. Use an adjustable spanner to turn the compression nut while holding the valve in place with a radiator valve spanner. This will avoid bending the vertical pipe that goes into the bottom of the valve.


The undo the union nut, turn it anti-clockwise in relation to the valve and clockwise in relation to the radiator.

Step 3 – Remove lower valve coupling

If you are replacing the valve as well as the tail, you will also need to release the lower valve coupling using an open-ended or adjustable spanner.


To undo, turn the nut anti-clockwise.

Step 4 – Remove the valve tail

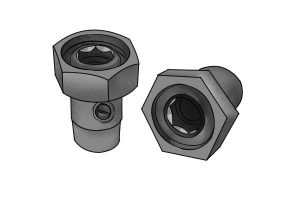
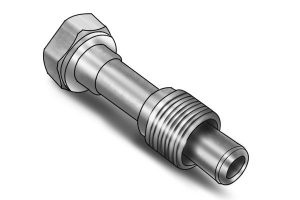
Remove the old valve tail with the hexagonal valve key, or use the grooves in the key to locate the internal lugs.


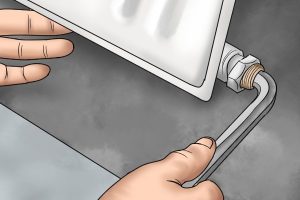
Turn the key anti-clockwise to remove the tail. They are sometimes hard to turn, so you may need to use considerable pressure.


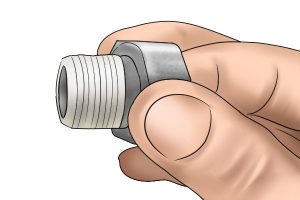
With one valve tail removed, you are now ready to repeat the operation on the other side of the radiator if that one is also to be replaced

Step 5 – PTFE tape

Before fitting the new tails, wind some PTFE tape, also known as thread tape, around the external thread of the tail. Thread seal tape is a polytetrafluoroethylene (PTFE) film cut to specified widths for use in sealing pipe threads. It will prevent possible leaks from the tail.

Step 6 – Insert new tail

Insert new tail valve to the radiator.

With the valve key, insert the new tail(s), turning the key clockwise until you have a firm fit.

Step 7 – Couple up new valves

You can now couple up new valves and refill the system with water.

Step 8 – Check for trapped air

Check for trapped air in the radiator.

All of the radiators will need to be checked for trapped air. Release any air from each one with a bleed key.


For a step-by-step guide to bleeding radiators, see  How to bleed a radiator

Wonkee Donkee Tools
Logo