


How to replace a wooden maul handle?
How to replace a wooden maul handle |
|
|
||||
 |
With prolonged use, many tools will eventually require some repair. | |||
 |
If your fencing maul handle requires replacing, use our simple step by step guide… | |||
Things you will need: |
||||
 |
Hand saw – preferably coarse toothed | |||
 |
Vice | |||
 |
Drill | |||
 |
7mm or ½” drill bit for wood | |||
 |
Hammer | |||
 |
Chisel | |||
 |
Sandpaper – Coarse grain | |||

|
Wooden maul handle replacement kit – consisting of a handle, wedges and pins. | |||

|
Step 1 – Remove remaining maul handle
Use the coarse toothed handsaw to cut away any remaining broken handle on the underside of the maul head. |
|||
 |
Step 2 – Clamp and support maul headPlace the head in a vice if you have access to one. |
|||
 |
If you do not have a vice, put the maul head on two solid surfaces with a gap in the middle and from the top down, using the hammer and the old maul handle as a punch, knock out the remaining handle through the gap.
This should be done in the same direction as the old handle would have been inserted. |
|||

|
Step 3 – Drill out remains of handleThis may well go to plan, but if the remaining handle is in too tight then it may require some assistance. Using a drill with a drill bit, drill holes in the wood, either through the top or the underside as this should help release the pressure holding the wood in place. |
|||
 |
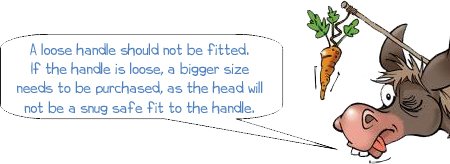
Step 4 – Re-size handleIf the new handle, when held to the eye on the maul head, is more than 2mm too big for the eye, it will need sanding down to size. However, bear in mind that the maul handle needs to be slightly too big to ensure it fits securely in the maul head. |
|||
 |
||||
 |
Step 5 – Insert maul handlePut the head of the maul onto the bench with the underside facing up. Insert the handle into the head (the end that has just been made to size) and use a hammer to gently tap the opposite end of the handle to fit into the head. |
|||
 |
If needed, use the vice to hold the head still, whilst fitting the new maul handle. | |||

|
Step 6 – Use firm taps as neccessaryIf a more forceful approach is needed, take hold of the maul head with the new handle inserted, and place the end of the handle on the ground. Keeping a tight grip on the head, firmly tap the handle on the ground to push it into place. |
|||
 |
Step 7 – Check handle for sizeWhen fitted, there should be at least 20mm (3/4″) of handle showing through the top. |
|||

|
Step 8 – Locate wedgesTwo small wooden wedges and two metal pins will have been supplied with the new maul handle. These are for securing the handle in place and to stop the maul head from coming loose. |
|||
 |
||||
 |
Step 9 – Try wedges for sizePut the maul on a bench, and try each wooden wedge into the slots, to ensure that, when fitted, they are large enough to expand the handle sufficiently to clamp the head. |
|||
 |
Step 10 – Insert wedgesOpen up the wedge slots using a chisel, then insert the two wooden wedges as far in as possible, tapping into place with a hammer if required. |
|||
 |
Step 11 – Trim excess maul handleTrim off any excess handle with a handsaw to give a flush surface, then sand down until all splinters and edges are removed. |
|||

|
Step 12 – Secure with pin
Drive in the metal securing pin perpendicular to the wooden wedges (as shown in the diagram) and the handle should now be tightly fitted into the head. |
|||
 |
||||
 |
To improve longevity of the handle, take some fine grain sand paper and lightly sand the wood, then apply boiled linseed oil.
Linseed oil will keep the handle in prime condition as well as making it water-resistant. |
|||
