


How to use a bearing puller?
How to use a bearing puller |
||||
|
|
||||
 |
Step 1 – Place pullersPlace the puller externally around the part or internally, depending on the part being removed. |
|||
 |
Step 2 – Adjust legsAdjust the legs of the puller so they fit tightly around or inside the part that is going to be removed. |
|||
 |
Step 3 – Position forcing screwNow position the forcing screw by turning it clockwise using your hands until the screw is touching the shaft. Make sure to adjust the legs until the centre of the screw is in the centre of the shaft. |
|||
 |
Step 4 – Turn forcing screwTurn the forcing screw slowly and carefully using either a spanner or a socket wrench applying force onto the shaft. |
|||
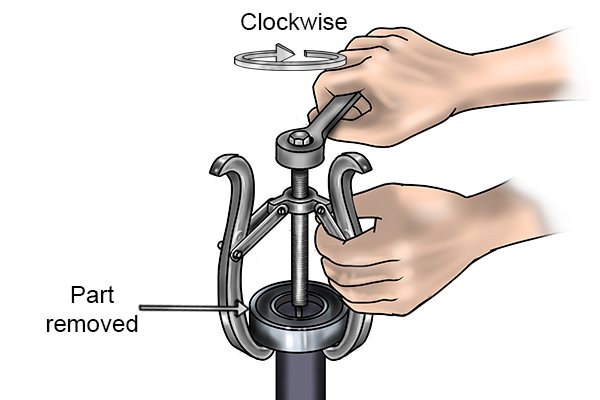 |
Step 5 – Remove partContinue the process by turning the forcing screw, which results in pulling the part off the shaft. |
|||
 |
Step 6 – Loosen forcing screwLoosen the forcing screw by turning it anti-clockwise and remove the part from the legs of the puller. |
|||
