Our other sites:

How to hide butt joints with plasterboard joint tape?

How to hide butt joints with plasterboard joint tape?

A butt joint is created when two square edges of plasterboard meet. As a result, the jointing tape and compound used to conceal the joint will sit above, rather than level with, the surface of the plasterboard.


When taping butt joints, the primary aim is to minimise the amount of build-up applied and to make the wall as smooth and flat as possible.


Step 1 – Cover Fasteners

Before filling any joint, run a knife along its length to check for any screws sitting above the surface of the plasterboard.


If necessary, screw the fasteners further into the plasterboard so that they sit below its surface. Then cover each screw head with jointing compound.

Step 2 – Apply Base Coat of Compound

Load your smallest knife with compound then apply it to the joint. Cover its entire length, working from the top to the bottom. Reload your knife when necessary.


When you have coated the whole joint, run your knife along the seam to smooth the mud and create as level a surface as possible.

Step 3 – Embed Tape

Take the end of your paper tape and position it at one end of the butt joint so it is centred over the plasterboard seam.


Then, working your way along the joint, push it into the mud with your fingers, before running the flat edge of your knife along its length.

This will smooth the tape and remove any excess mud.


There should only be a very small amount of compound left behind the tape.


It is trickier to conceal a butt joint, extra care must be taken to remove excess compound from underneath the tape.

Step 4 – Cover Tape with Compound

Once the tape is in place and the surface of the joint is relatively smooth, wait for the mud to dry.


Then, cover the entire seam with more compound, this time using the 200mm taping knife, to extend the area covered by the mud.

Step 5 – Remove Imperfections

When the second coat of compound has dried, scrape off any high spots with your knife.

Step 6 – Apply Third Coat of Compound

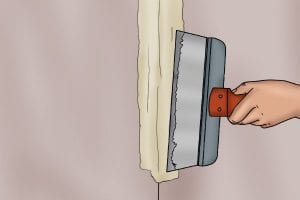
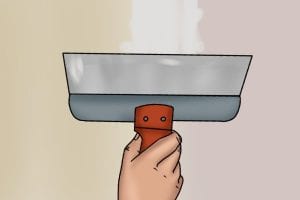
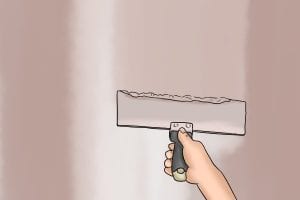
Use your largest knife to apply a third and final coat of compound to your butt joint.


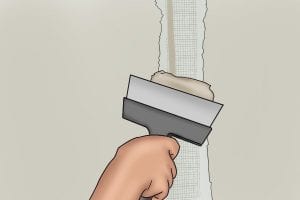
As the tape and mud will sit proud of the joint, it is particularly important to feather the edges of the compound to help them subtly blend into the plasterboard.


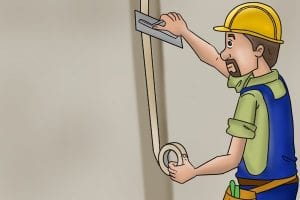
This is done by holding only one side of your knife tight against the compound whilst you smooth it along the joint.


Then repeat with the other side of the blade.

Step 7 – Sand the Surface

When the third coat of compound is dry, to remove any final imperfections, sand the surface of the entire joint with 180-220 grit sandpaper and a hand sander. 


For high walls and ceilings, use a pole sander.

Step 8 – Decorate

At the end of the process, your butt joint should be completely concealed and the surface should be smooth.


Your wall is now ready to be primed and decorated.

Wonkee Donkee Tools
Logo