


How to apply pebbledash with a manual coating sprayer?
How to apply pebbledash with a manual coating sprayer |
||||
|
|
||||
Preparing the wall |
||||

|
Step 1 – Clear and prepare wallMake sure the wall area to be covered is free from dust, moss, loose brickwork or mortar. Any loose areas must be repaired. |
|||
 |
Step 2 – Dampen wallBrush the wall with water so that it is damp but not saturated, ready for the first mix. This will prevent the wall absorbing the water in the mix and drying too quickly. |
|||
 |
When an applied mix dries out too quickly, it doesn’t bond to the wall adequately. When this happens, the applied mix can crack, become loose and fall away from the wall. | |||
Gathering your equipment |
||||
 |
Step 1 – Choose your cementFirst, decide on the type of cement you want to use. The base, or first coat can be made with general purpose cement but you may want to use a white cement for the finishing coat as this can give a more attractive finish in contrast to the stones and pebbles |
|||
 |
White cement is similar to grey cement in all aspects except for its high degree of whiteness.
As there is a longer process to produce the white cement, it is more expensive than ordinary grey cement, so be aware of this when making your decision. |
|||
 |
Step 2 – Choose your aggregateChoose the type of stone, pebbles or shells (aggregate) you want to put into your cement mix. |
|||
 |
Measure the area to be covered by multiplying the area width by the height and allow one 25kg bag to cover approximately 2-3 square metres of wall coverage (depending on mix used). | |||
 |
Applying the pebbledash needs to be done before the wet concrete base coat dries. Make sure you have enough aggregate to complete the area to be covered before you start, otherwise it could all end in despair, as the pebbledash will not stick to the base coat if too much time lapses and the base coat dries before applying! | |||
 |
With pebbledashing, the pebbles ideally need to be supplied in bags. This ensures that you will have a much better result due to a more even spread of pebble sizes applied to the wall. This is because bagged pebbles are sized, washed and any small bits of stone are omitted. | |||
 |
Step 3 – Choose your sandMake sure you choose the correct sand for the job in hand! Building sand is not ideal as it allows moisture to pass through more readily once the mix is set on the wall. |
|||
 |
Sharp sand (sand with grit in) is recommended, as it repels moisture better than building sand and helps to ‘knit’ the mix together, allowing for a stronger mix which is ideal for work such as roughcasting.
Plasterer’s sand is recommended for the final coat as it allows for a ‘creamier’ texture, which is not as heavy and will not dry out as quickly as sharp sand or building sand, although all sand types mentioned here can be used. |
|||
Mixing the cement |
||||
 |
Step 1 – Enlist the help of a co-workerIf possible, always have two people carrying out the work. One can be mixing while the other one does the spraying. |
|||
 |
Step 2 – Use clean waterAlways use clean water when mixing. The mix properties can be affected otherwise and any work could potentially fail. |
|||
 |
Step 3 – Add waterprooferWaterproofer should be added into the mix before applying to the wall. This will help prevent rainwater penetrating the cement mix and getting to the brickwork. Always read the usage instructions on the container to ensure the correct amount is used with each mix. |
|||
 |
Step 4 – Add plasticiserAlways use a cement or mortar plasticiser when mixing. This will give a smoother effect to the cement mix and give you a bit more time to work with the mix before it starts to dry. |
|||
Base, ‘first’ or ‘scratch’ coat |
||||
 |
Step 1 – Re-dampen wall if requiredYou may need to dampen the wall again before applying your base coat, to ensure the mixture sticks to the wall properly and does not dry out too quickly. |
|||
 |
Step 2 – Mix base coatA standard mix for the base coat would be 1 part cement and 1 part lime to 3-4 parts sand, mixed with clean water. If more than one coat is required, before applying the pebbledash, it is common practice to apply each consecutive coat with a weaker sand mix to the previous one. |
|||
 |
This ensures that the base coat and each consecutive coat is a stronger compound than the finish coat, allowing for a stronger bond with less risk of the finish coat pulling off the layers underneath.
For example: First coat 2:1:4 (cement:lime:sand); Second coat 2:1:6 (cement:lime:sand) and so on. |
|||
 |
Step 3 – Apply base coat & scratchOnce applied to the wall, you should scratch lines into the mixture using a plasterer’s scratcher, also known as a ‘scarifier’. This will allow proper adhesion between the coats. |
|||
 |
You can scratch any pattern you wish, but try and ensure the surface is as even and smooth as possible, so that your next layer is level. If applying more than one layer before the finish layer, each previous layer must be scratched to ensure they stick together properly. This should also be done for patchwork (repairing a small area of the wall already pebbledashed). | |||
 |
The base coat should be completely dry before applying the second coat. (Normally, the finish coat which is the pebbledash mix, is the third coat when pebbledashing). | |||
Second or final coat |
||||
 |
The second coat or ‘finishing coat’ of pebbledash is usually the same thickness as the base coat, although the mix ratio is slightly weaker than that of the base coat. This ensures that the finish coat doesn’t pull away the base coat. | |||
 |
Step 1 – Mix final coatA standard mix for the final coat ready for the pebbledash, would be 1 part cement to 2-3 part sand mixed with clean water (the mix is applied evenly to the wall before the pebbles are then ‘hurled’ onto the mix). |
|||
 |
Always ensure that the final coat is a slightly weaker mix (approximately a third more sand) to that of the scratched base coat. The final coat should be a relatively wet mix, but slightly tacky, ready for the pebbles to be applied to it. | |||
 |
Step 2 – Prepare aggregateMixing 2-3 bags of aggregate (in this case, pebbles) together to obtain a consistent colour mix, is advisable. This can be done by pouring the pebbles into a bucket or mixing tray. |
|||
Pebbledashing using a harling trowel |
||||
 |
A ‘harling trowel’ specifically designed for applying pebbles to walls, is available to rent or buy. For more information on hurling trowels, see ‘What are harling trowels’ page. | |||
 |
Flick, throw or ‘Hurl’ the pebbles against the mix previously applied to the wall using the harling trowel, being careful to avoid creating ‘patchy’ areas (areas where pebble quantity/coverage is insufficient). | |||
 |
Move along the length of the wall applying the pebbles. Move the catch tray along with you as you go. The pebbles that fall into the catch tray can be re-hurled onto the mix as they will be clean and free from contaminates. | |||
 |
Do not use pebbles that have been scraped up off the floor without washing and screening them beforehand. Any contaminates like soil, leaves or other stones will not only ruin the look of the pebbledash but also prevent proper adhesion to the wall. | |||
Pebbledashing using a manual coating sprayer |
||||
 |
Most pebbledashing, using over 5mm (3/16″) sized pebbles, is done by hand using a harling trowel and a bucket and catch tray, especially on large wall areas.
However, if there is only a small area to be done or ‘patched’ using pebbles of 5mm (3/16″) diameter or less, a manual coating sprayer can be used (provided the pebbles are not too large to clear the flicker comb fingers – not all designs are the same, so check prior to using). |
|||
 |
Step 1 – Fill sprayer with pebblesFill the manual coating sprayer with your chosen pebbles and rotate the handle while moving the sprayer up and down and left to right until an even layer has been applied. |
|||
 |
As when applying with a harling trowel, always use a bucket or a long tray moved along the base of the wall as you are working to catch any excess pebbles that do not stick to the screed. These can be re-used later on. | |||
 |
Do not use pebbles that have been scraped up off the floor without washing and screening them beforehand. Any contaminates like soil, leaves or other stones will not only ruin the look of the pebbledash but also prevent proper adhesion to the wall. | |||
 |
Step 2 – Clean upEnsure all tools used to carry out the task have been cleaned down and correctly stored away (see ‘How to clean a manual coating sprayer’ page). |
|||
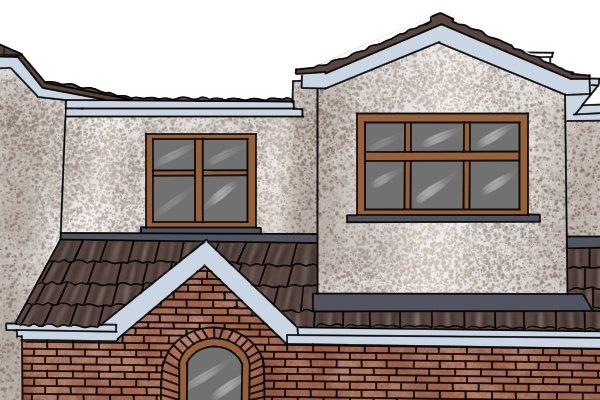 |
Above all, relish the challenge, be positive and enjoy the fruits of your hard drawn labour! There’s no reason why you can’t achieve a result like this. | |||
