Our other sites:

How to float concrete?

How to Float Concrete

Example of an individual floating concrete.

Floating concrete is the process of flattening and smoothing out concrete to ensure for a level finish. This guide explains the importance of the process as well as a step by step guide to floating concrete.

What is Concrete?

Concrete is a rock-like building material made by mixing together paste and aggregates (sand and gravel or crushed rocks). The paste, which comprises cement powder and water, coats the surface of the fine and coarse aggregates.


A chemical reaction with water called hydration then glues the aggregates together so that the mixture hardens and gains strength to form concrete.

All elements that are combined to create concrete including cement, sand, water and stones.

Laying concrete has to be done swiftly, as it will start to set within a couple of hours. The floating process is essential to make sure the surface is as flat as possible.

First step of floating concrete is to wait.

Guide to Floating Concrete

Step 1 - Prepare Form

Make a form, or frame, out of pieces of softwood. These should be about 25mm thick and slightly longer than your concrete base is going to be.


Drive stakes in at 30-60cm intervals around the edge for reinforcement, and use a spirit level to make sure the base doesn’t slope.

Create a barrier by laying stakes before floating concrete.

Cover the bottom of the form with at least 10cm of hardcore – small pieces of stone, gravel or crushed brick. Hardcore acts as a stable base and also allows water to drain from the wet concrete.

Cover the bottom of the floor with at least 10cm of hardcore.

Step 2 - Pour Concrete

Pour or shovel the concrete into the form, using a spade to make sure it’s distributed evenly into all four corners. It is important to do this thoroughly to ensure that there is an even distribution of concrete over your chosen area. 

Pour concrete on top of the previously laid hardcore.

Step 3 - Screed Concrete

Screeding is a process carried out with a long straight piece of wood, called a screed board, to level off the concrete.


Push or pull the screed board across the form using a steady back and forth sawing motion. Fill in any troughs that appear in the concrete with a trowel.

Push and pull a screed to level the concrete for a flat surface.

Step 4 - Smooth Concrete

As soon as you’ve finished screeding, go over the slab with a darby. Sweeping it in overlapping arcs will fill any small holes left by screeding and level the surface. It will also make the concrete smoother by forcing larger pieces of aggregate down and bringing a liquid mix of small sand and cement particles to the surface.

Use a darby on the surface to fill any small holes and create a smooth finish.

If you’re working on a large area of concrete, you might need to use a bull float – a large metal float with a detachable handle – instead of a darby. Push the bull float in one direction only across the concrete, keeping its front edge slightly above the surface by raising or lowering the handle.


Two or three times is enough. Don’t overwork the concrete or you’ll weaken it by drawing too much sand and cement to the surface.

On a large area a bull float will be perfect for smoothening the newly laid concrete.

Step 5 - Wait for Surface to Dry

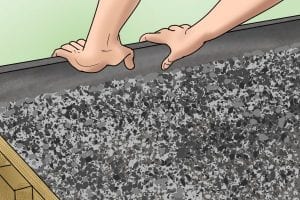
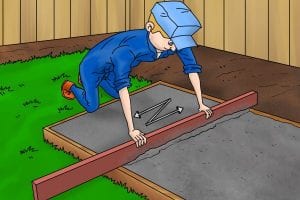
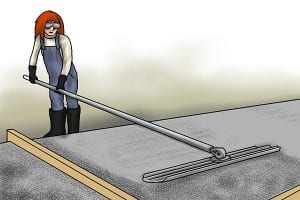
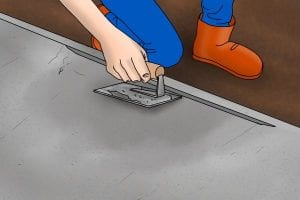
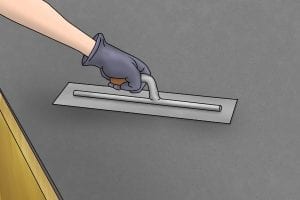
While you’re screeding the concrete, water will ‘bleed’ out of it and sit on the surface for a while until it gradually soaks back in.


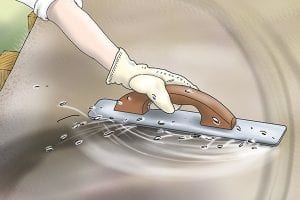
Wait for the water to completely drain back in before working any further on the slab.


If you begin using a float too soon, you could sweep some of the water off the slab before it has a chance to be re-absorbed.

Wait for the concrete to dry after floating.

Reducing the water content will weaken the surface of the concrete. This is because a certain amount of water is vital for curing to take place (the process by which the concrete dries, hardens and reaches its full strength). Losing some of the water will alter the original composition of the concrete mix.

Allow the concrete to soak in the water when floating concrete.

Step 6 - Float Concrete

Sweep a magnesium float across the concrete in wide arcs, holding it at a slight angle facing away from you.


Press down on the back edge as you go. This will carry on where the darby left off, pushing down coarse aggregate and bringing up finer material to leave a smoother, denser finish. 

Use a magnesium float to screed across the concrete surface after it has dried.

Step 7 - Add Texture

If you want more textured concrete, for instance to create a non-slip surface, you can swap the magnesium float for a wooden one, which will leave a slightly rough finish.

Adding texture to a surface whilst floating it for more grip using a textured float.

Alternatively, use a stiff bristled broom to make a slightly ridged surface when the concrete has partly hardened.


Push or drag the broom across the slab in one direction only, to create uniform lines. Remember to wash the broom immediately afterwards.

Using a broom to create a lined finish to floated concrete after installation.

Step 8 - Round Off Edges

With an edging tool, work your way around all sides of the slab pressing down with long, smooth strokes to neatly separate the edges of the concrete from the wooden form.

Using an edging tool to round off the edges of the newly floated contcrete.

Step 9 - Trowel Concrete

For a smooth finish, go over the slab with a steel trowel once the surface water has drained away and the material has begun to harden.


Hold the trowel almost flat and swing it in large circles while pressing down on the concrete. Repeat no more than two or three times.

As the water is finished being absorbed use a trowel on the newly floated concrete.

Step 10 - Protect Concrete

Keep the concrete moist for the next five to seven days. This slows down the curing (setting) process and will make the concrete stronger.


You can do this by using a water sprinkler, covering the concrete with clear polythene or applying a curing compound. The concrete should then be left to cure for about four weeks.

Moisten the concrete with water for the next few days in order to help the surface set to its hardest possible state.

Wonkee Donkee Tools
Logo