Our other sites:

Introduction To DeWalt Planers

Introduction to DeWalt Planers

Power planers are ideal for large woodworking projects.

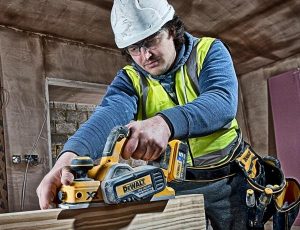
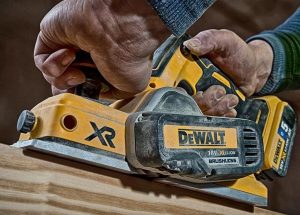
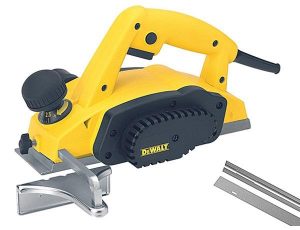
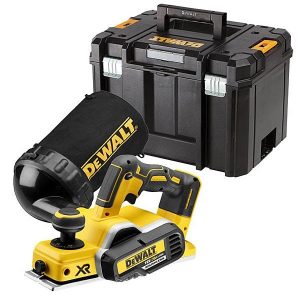
Power planers are great time-saving tools designed to shave the top layer off a piece of wood to achieve a flat surface and remove marks. They can also smooth rough corners and create chamfered (angled) edges.


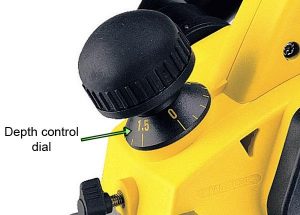
Planers are used for a wide range of carpentry and woodworking tasks, especially making or levelling doors, beams, handrails, ceiling joists, furniture, cabinets and worktops. They work using sharp rotating blades inside a cutter head which can be set to operate at different depths.


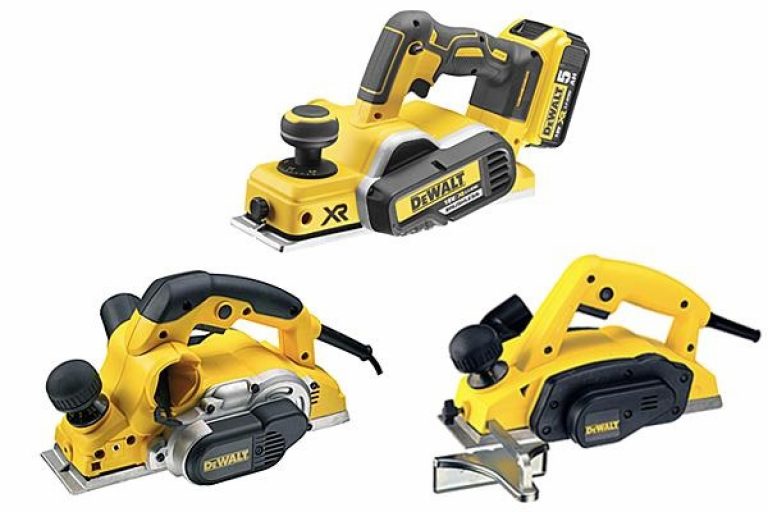
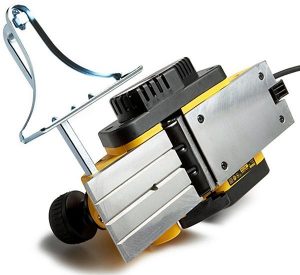
Most planers come with an adjustable fence, or guide, to help keep the cut at a consistent 90° angle. Both corded and battery-powered models are available.

How to choose a DeWalt Planer?

Dewalt cordless planer in use.

Features to look out for when selecting a powered planer include:

Size and weight


Cutting depth


Corded or cordless


Blades


Shoe


Accessories

Size and Weight

Large and small Dewalt planers.

A small, lightweight planer may be convenient for use in restricted spaces and when working with relatively soft wood such as pine or cedar.


If you frequently tackle hardwoods such as oak, ash or beech, consider a larger machine. As well as being able to cut tougher materials, a heavy-duty planer is also more stable as the weight helps to keep it steady on the workpiece. DeWalt planers range from 2.8kg to 5.6kg.

Cutting Depth

A knob is used to adjust the planer's cutting depth.

The depth of cut is a particularly important factor. Compact single-handed planers may provide a maximum cutting depth of about 1.5mm, whereas a more powerful machine might be able to cut up to 4mm.


You alter the depth by turning a knob on the front of the machine. The available depths are usually marked in 0.1mm increments on a dial just below the knob, which doubles as an additional grip for two-handed use.

Corded or Cordless

Cordless planers are increasingly popular.

Most planers are corded, but cordless versions are becoming increasingly popular with the constant development and improvement of lightweight Lithium-Ion batteries. Once it’s charged up you can take a cordless tool anywhere, and there’s no cable to get in the way.


DeWalt’s DCP580 planer features a brushless motor for maximum efficiency and long life, and weighs less than 3.8kg even with the battery attached.

Blades

Planer blades are often reversible.

The blades are secured inside a drum rotating at high speed underneath the machine, and can normally be both resharpened and replaced. Planers may have between two and five blades, which can often be stored on board the tool when not in use.


Many blades are reversible, so when one edge becomes blunt you can turn it over and use the other side. Tungsten-tipped blades will last much longer than non-coated ones.

Shoe

Most planers have chamfering grooves on the shoe.

The shoe is divided into two parts. The front, or adjustable shoe can be raised up or down by twisting the control knob to alter the cutting depth, whereas the rear shoe is fixed.


Most planers feature V-shaped grooves on the base of the front shoe which make chamfering tasks much easier.


Total shoe length tends to vary between around 290mm and 320mm. A long shoe provides good stability and can cover a larger area of wood than a compact one, but is less suited for use in cramped spaces.

Accessories

Planer accessories can be very useful.

One of the most useful accessories is probably a collection bag, which connects to an ejection port to stop chips being blown around the room (and possibly into your face). Some planers have a port on both the right and left side for convenience. You can also use the port to attach a hose leading to a dust extraction system.


Planers nearly always come with a guide fence to keep the tool parallel to the workpiece, and can be positioned anywhere along the shoe. The longer and larger the fence, the more control it will give you. Another handy accessory is a rebate depth guide, which can be fixed to the side of the tool when needed.

Planing Hints and Tips

  1. Respect the planer! Those spinning blades can do a lot of damage if you’re not paying attention. Wear eye protection to avoid any flying debris, and hold the tool with both hands where space permits.
  2. Before you start, alter the cutting depth to suit the task at hand. Choose a fairly deep setting for removing a large amount of material, and a shallower one for smooth finish cuts and minor trimming work such as fitting doors.
  3. Begin the cut by lightly resting the tip of the front shoe on the work surface with the planer pointing slightly upwards at the rear, then switch the machine on. When the planer has reached full speed, lower it so that the front shoe is flat on the work surface then slide it forward in a single smooth movement.
  4. Try and keep the rear of the shoe parallel to the piece of wood all the way through the planing stroke. This will prevent more wood being shaved off the ends than from the centre – a common fault known as dipping. You can use a metal straight-edge to check for flatness as you go along.
  5. To avoid gouging, don’t lift up the planer until the cutter head has cleared the whole workpiece. Make several passes over the wood, shaving off a little each time. This will produce a smoother finish than one deep sweep.

Wonkee Donkee Tools
Logo