Introduction to DeWalt Biscuit Jointers
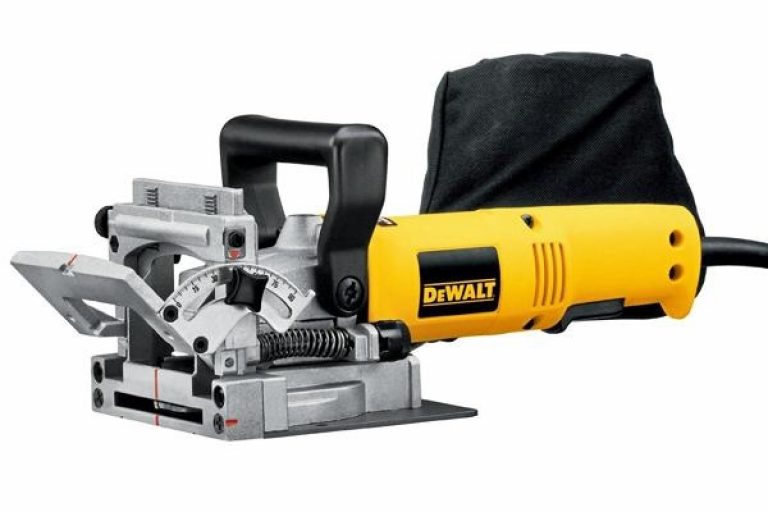
There are many ways to join two sections of wood together but the biscuit joint is one of the most subtle, as it remains hidden within the workpiece. The jointer works by cutting a small crescent-shaped notch into each piece of wood using a circular saw blade.
You can then insert a biscuit (a thin, oval-shaped piece of timber) into the hole on one side, coat it lightly in glue and press the two pieces of wood together. This results in a solid and reliable joint which will prevent any sideways movement in the workpiece.
What are the advantages of DeWalt Biscuit Joiner?
Accurate alignment, strong hidden joints and precise control all combine to make a biscuit jointer extremely useful in many aspects of woodwork. Because the biscuit is holding the workpiece in place, this type of joint can be more easily screwed or nailed.
It is also particularly useful for attaching two pieces of wood of varying thicknesses, as you can set the tool to make the cuts at a consistent depth below the surface. Biscuit jointers are widely used for making items such as boxes, cabinets, drawers, worktops, cupboards, shelves, window frames and furniture trim.
What to look for in a DeWalt Biscuit Jointer?
The following features are particularly useful in a biscuit jointer:
Precise fence alignment
Pre-set cutting depths
Anti-slide grippers
Dust extraction
Ergonomic handle
Spindle lock
Precise Fence Alignment
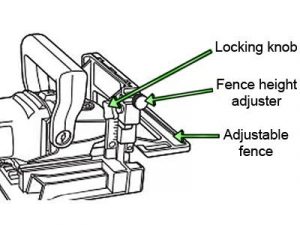
A height adjustable fence with a window and eight guiding notches enables you to choose the precise point at which the slots for the biscuits will be cut. The fence on the DeWalt DW682K moves up and down using a rack-and-pinion gear system that holds it securely in a parallel plane to the blade.
You can also change the angle of the fence up to 90°. A numbered scale on the side of the fence makes adjustments easy and helps you position the tool with maximum precision.
Pre-Set Cutting Depths
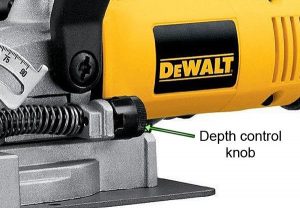
A plunge depth adjustment knob with settings for the most common sizes of biscuit – 0, 10 and 20 – make it quick and easy to set the cutting depth of the jointer, so look out for this feature.
The M on the DeWalt DW682K denotes the maximum cutting depth of about 22mm. Simply twist the depth adjustment knob to the position you require, lining up the right number with the red marking on the jointer.
Anti-Slide Grippers

Anti-slide grippers, also known as anti-slipping pins, consist of two screws that protrude slightly from the front of the jointer base. Their purpose is to stop the tool sliding sideways, so it cuts in a straight line.
To avoid scratching, you can retract the pins by turning them slightly clockwise with a screwdriver until they are flush with the base. This is recommended when working on parts of the workpiece that will remain visible afterwards.
Dust Extraction

Operating a biscuit jointer can create large quantities of dust and debris, especially if you are working on fibre board, so look for a machine with a dust bag. A spout allowing connection to a workshop vacuum is another extremely useful feature.
Working without an effective dust extraction system may not only be damaging to your health but will also eventually clog up the tool’s motor.
Ergonomic Design
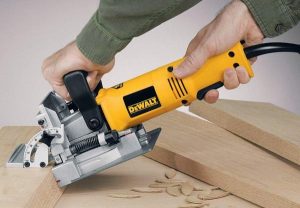
A comfortable, well-designed body will make the biscuit jointer much easier to use and give you maximum control. Look for one with a slimline barrel grip and cushioned rubber handle that allows two-handed use when required.
A lock-on button is another effort-saving feature. You can set the tool to run continuously, avoiding the need to keep the trigger pressed down while you work.
Spindle Lock
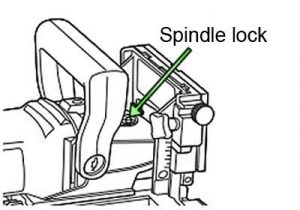
The spindle lock is a safety measure that prevents the shaft of the tool from rotating, allowing you to change accessories quickly and easily.
To replace the blades on a DeWalt jointer, unscrew the cover from the base plate, press down the spindle lock button and remove the flange by turning it anti-clockwise. Change the blade, put the flange back, release the spindle lock then replace the base plate cover.
Tips on using a Biscuit Jointer
- Before you start, arrange the mating pieces as they will look after assembly and mark the cutting line using a pencil and set square.
- Measure the thickness of both pieces of wood to be joined, then set the cutting depth on the jointer to half that figure. This will make sure that the joint is exactly in the centre of the workpiece.
- Choose the correct biscuit size for the task, and turn the plunge depth dial on the jointer to the corresponding position. The general rule is to select the largest one that will fit in the board, as this will provide maximum support.
- Even the smallest biscuit size may be too large for narrow items such as picture frames. However, to make it fit you can trim off the exposed tip of the biscuit after gluing the joint.
- Make sure the jointer is set to the right height for the cut. Test it on a piece of scrap wood first and adjust if necessary.
- Connect up a dust extraction system if you have one, to avoid breathing in harmful particles.
- Line up the centre marking on the base of the jointer with your pencil mark. Press down on the thumb rest at the front of the biscuit jointer as you cut. This will make it more stable and help prevent any wobbling. Use both hands to hold the tool whenever possible.
- Space the biscuits evenly at intervals of 15-25cm along the edge of the workpiece, and position the outer biscuits around 5-7.5cm from each end.
- For added strength, you can use two rows of biscuits on boards that are more than 2.5cm thick.
- Take extra care when joining workpieces less than 15cm wide, as the pins in the guide will not be able to grip the wood to prevent any kickback.
- Use a brush to spread the adhesive. This will result in a more even coating than squirting it directly from the bottle. Apply the glue generously to both the slots and the corresponding mating surfaces of the joint. The biscuits will absorb the adhesive, making them swell and increasing their holding power.
- If you cut a slot in the wrong place and find the boards won’t align properly, you can rectify it fairly easily. Glue a biscuit into the slot, let it dry fully then cut off the protruding part. Plane the biscuit flush with the workpiece, then re-cut the slot in the right position.
- Store your biscuits in an airtight container with a few grains of rice or a silicon gel bag to absorb moisture. This will prevent them swelling before use.
- Always wear safety glasses and ear defenders when using a biscuit jointer.


