


How to use a brace?
How to use a brace |
||||
|
|
||||
Other equipment you may need |
||||

|
ViceDepending on the size and shape of your workpiece, you may want a vice to hold it in place whilst you drill your holes or drive your screws. |
|||
 |
ClampYou may want to use some clamps to hold the workpiece in place, or two parts together, whilst you use the brace. |
|||
 |
Work benchPlacing the workpiece on a work bench may make drilling or driving screws easier. |
|||
 |
Drill bit or socket bitYou will need an appropriate size drill bit for drilling holes, or socket bit for driving screws. |
|||
 |
Measuring deviceA measuring device such as a tape measure or ruler will be required to measure the correct position of the holes you wish to drill. |
|||
 |
Pencil or other marking toolA marking tool such as a pencil, scriber or marking knife should be used with your measuring device to accurately mark the position where screws or holes are to be placed. |
|||
Using a brace |
||||
 |
Step 1 – Mark outBefore you begin drilling or driving screws into a workpiece you should always mark out the position of where you want them to go. Using your measuring device and marking tool, measure from the edges of your workpiece, placing a mark where the screws or holes are required. |
|||
 |
Step 2 – Secure bitTurn the shell of the chuck anti-clockwise to separate the jaws. |
|||
 |
Once the jaws have been separated just enough to accommodate the drill bit or socket bit, place the bit between them in the chuck.
Then turn the chuck shell clockwise to tightly grip the bit. |
|||
 |
Step 3 – Select ratchet settingIf your brace has a ratchet mechanism fitted, you should now set this so that the brace will only turn the bit in the direction you want. |
|||
 |
Brace ratchets are usually set by twisting a collar just above the ratchet gear, or moving a bar above the ratchet gear backwards or forwards. | |||
 |
If you have room to make complete turns of the sweep handle then you should set the ratchet in the non-ratcheting position.
This will allow you to make complete smooth turns of the brace, which will give quicker, more accurate drilling as the brace is less likely to lean off in one direction. |
|||
 |
Set the ratchet to only turn the bit clockwise for drilling or driving screws in a tight space where you can not make complete turns of the sweep handle.
If you are using the brace to remove screws, set the ratchet to only turn the bit anti-clockwise. |
|||
 |
Step 4 – Position bracePlace the tip of the drill bit on the point of the workpiece you marked out earlier. When drilling or driving screws into a workpiece, always try to have the drill bit at a 90° angle to the surface of the workpiece. This will reduce the chances of the bit slipping and sliding across the surface of your workpiece and damaging it. |
|||
 |
Step 5 – Hold braceGrip the sweep handle of the brace with your dominant hand as you would a sword or umbrella. Then place the palm of your other hand on top of the brace head. |
|||
 |
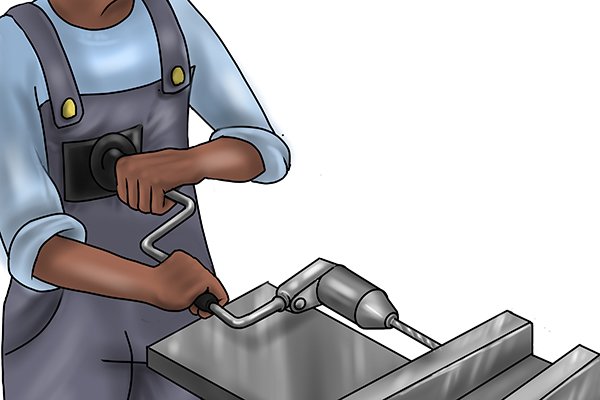
When drilling vertically with a brace, use your non-dominant hand to apply downward pressure to the drill bit. | |||
 |
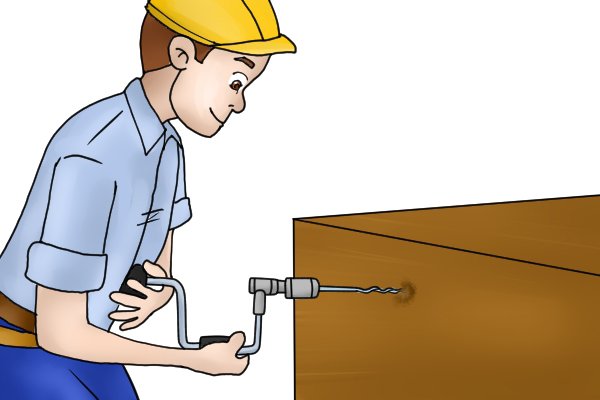
If you are drilling horizontally with a brace, the head of the brace can be placed against your chest so you can use your body weight to apply more pressure to the drill bit if needed. | |||
 |
Step 6 – Turn sweep handleOnce you have the brace positioned and held correctly, rotate the sweep handle through complete turns if there is room to do so. This ensures the drill bit is constantly turning and so is less likely to stick in the hole you are drilling. |
|||
 |
If you are unable to make complete turns of the sweep handle, rotate the handle as far as possible before moving it back to the starting position, and repeating the action.
Continue with this back and forth movement and the ratchet will ensure the drill bit is only turned in the direction you have set it. |
|||
 |
Step 7 – Clear out shavingsAs you drill, shavings from the workpiece will be produced and raised up out of the hole by the flutes of the drill bit. These shavings can clog up the flutes of the drill bit and create friction, which will make the drill bit heat up and expand. This can result in the drill bit becoming stuck in the hole, or even breaking if it is a small bit. |
|||
 |
To help prevent this from happening, you should remove the drill bit from the hole every few millimetres, before placing it back in.
Keep the drill bit turning whilst you do this so that the shavings continue to be removed. |
|||
