


What types of woodturning cut are there?
What types of woodturning cut are there? |
||||
 |
||||
 |
There are many different cuts that can be made when spindle-turning on a lathe. Below is a guide to some of the most common cuts and how to make them. | |||
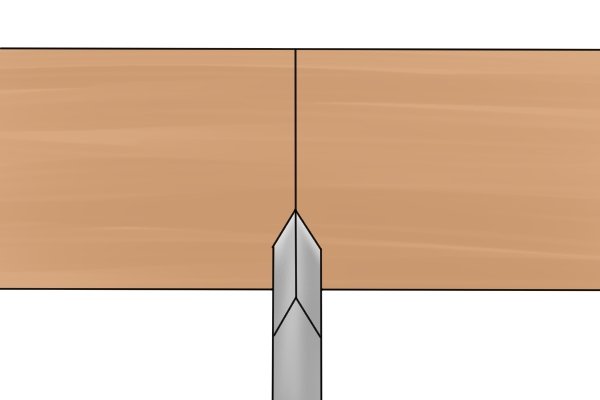
V-cuts |
||||
 |
V-cuts are partitions made in your spindle, which may be made as a simple design or to section off certain areas prior to further shaping. V-cuts are made with a skew chisel or parting tool. | |||
 |
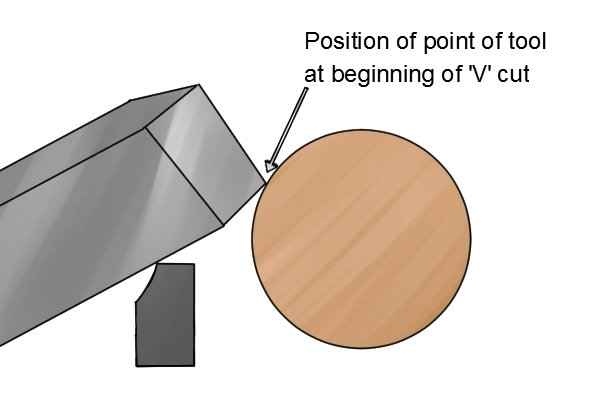
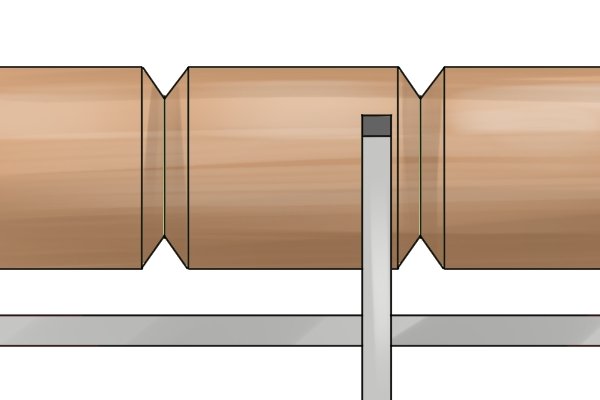
Step 1 – Position your toolPosition your parting tool or skew chisel so that its narrow edge rests on the tool rest. The blade’s cutting edge should be in direct line with the middle of your V-cut. |
|||
 |
Step 2 – Angle of bladeThe sharp edge of your parting tool should be angled slightly upwards so that the tool’s handle can be lifted slightly and the blade introduced to the workpiece (using the tool rest as a pivot point). In this fashion, cut an initial groove into your workpiece where you want your V-cut to be. Lower the handle to pull the blade back from the workpiece. |
|||
 |
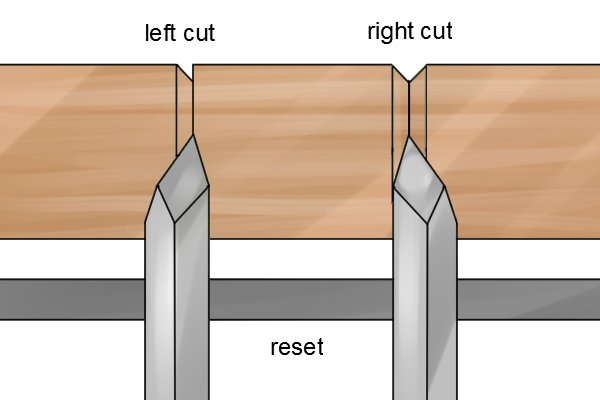
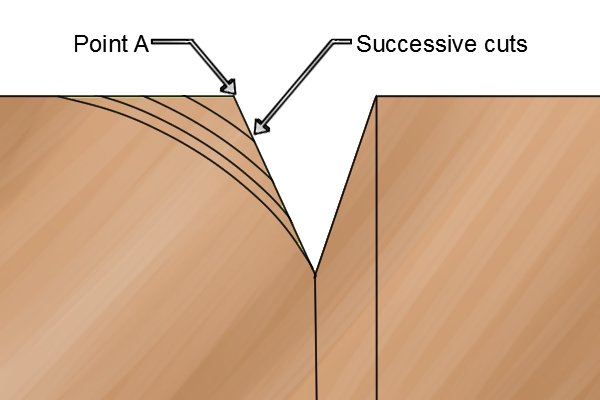
Step 3 – Left and right cutsAfter the initial groove has been cut, angle the blade to the left and right to widen the cut and get that distinctive “V” shape. |
|||
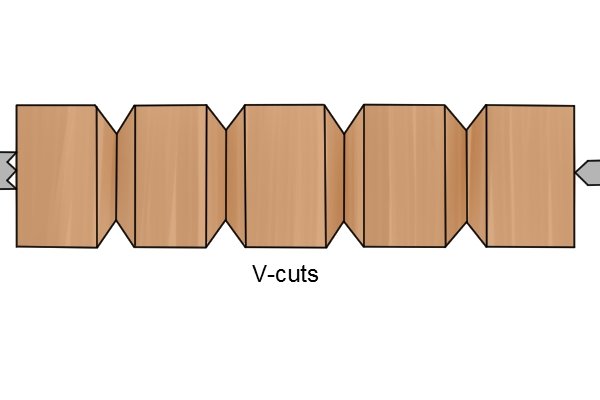 |
Step 4 – Repeat cutsRepeat this process with as many cuts you need to make along your workpiece. |
|||
Coves |
||||
 |
Coves are curved recesses that are commonly shaped like the arc of a circle, though they may be more irregular shapes, as long as they are some form of hollow. Coves are made using a spindle gouge and a parting tool. | |||
 |
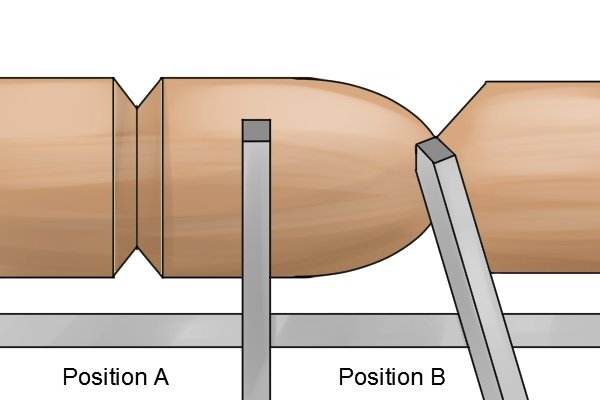
Step 1 – Mark width of coveUsing a parting tool, mark two shallow cuts at either end of the desired width of your cove. |
|||
 |
Step 2 – Cutting the coveUsing a spindle gouge, and starting just left of the centre, make a small cut into your workpiece. You should always work towards the centre of your cove between the marking cuts, turning the blade as you go. For the second cut, start just right of the centre and, again, work your gouge towards the middle. Repeat this process, widening the cut each time until you reach the marking cut lines. |
|||
 |
The last cut you make should finish with your spindle gouge in the centre of your cove. | |||
Beads |
||||
 |
A bead is where the wood turner cuts a rounded shape into the spindle by removing small amounts of wood to create recesses either side of the circular form. This cut is commonly made using a square parting/beading tool and a skew chisel. | |||
 |
Step 1 – Mark cut linesFirstly, using a skew chisel, mark two cut lines into your spindle. These lines should mark the width of your finished bead. |
|||
 |
Step 2 – Widen to V-cutsUsing the V-cut process, widen the lines to V-cuts by leaning your chisel to the right and left. |
|||
 |
Step 3 – Shaping the beadNow position the square parting/beading tool with its blade a little over the tool rest and its cutting edge at the top of the V-cut. |
|||
 |
The tool must start at the top of the V-cut and move down into the bottom of the “V”, rounding off the corner of the bead bit-by-bit. | |||
 |
As the curvature of the bead starts to form, move your chisel closer to the centre of your bead with each successive cut and end with the chisel again at the bottom of the “V”. | |||
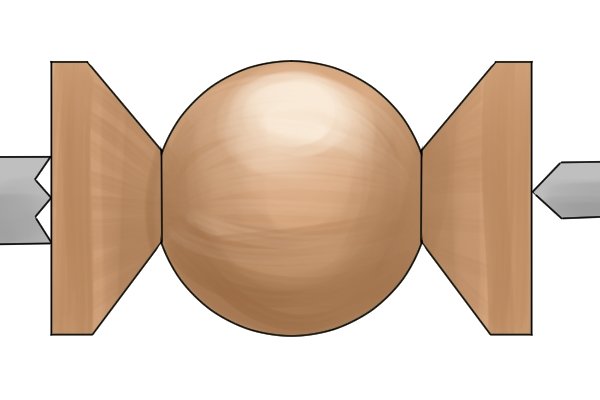 |
When you have completed this for both sides of the bead, you should have a smooth, round bead. | |||
| Images on this page are used with the kind permission of Brian Clifford at www.turningtools.co.uk | ||||
