


How to draw perpendicular lines using trammel heads?
How to draw perpendicular lines
|
||||
 |
Like compasses, trammel heads can be used to construct perpendicular lines. This makes them suitable for use in the laying out stages of a range of woodworking tasks. | |||
 |
||||
 |
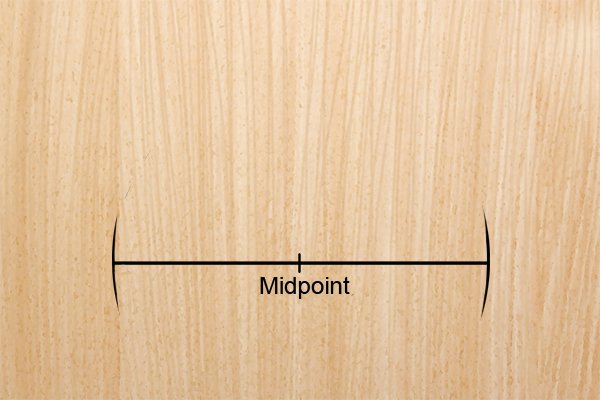
Step 1 – Draw primary lineDraw a primary line of the desired length using a ruler or straightedge. |
|||
|
Step 2 – Find midpointHalf the length of the line to find the approximate midpoint. Mark this midpoint on the line. This will be the point at which the secondary perpendicular line meets the primary line. |
|||
 |
Step 3 – Set up beam compassSet up your beam compass by clamping each of your trammel heads to a beam. The distance between the two trammels on the beam is not critical, although they should be slightly under half the length of the primary line apart. |
|||
 |
Step 4 – Draw reference marksUsing your trammels, scribe arcs “A” and “B” at each end of the line from the midpoint mark. |
|||
 |
Step 5 – Scribe two arcsReset your trammels so that they are slightly longer than half the length pf the primary line apart. The point at which the arcs intersect one another is where the perpendicular line will start. |
|||
 |
Step 6 – Connect pointsConnect the point where the arcs meet to the midpoint on the primary line. |
|||
 |
Step 7 – Erase marksUsing an eraser, rub out the arcs and the reference marks. You will now have two lines perpendicular to one another. |
|||
