


How to use a bi-pole pot magnet?
How to use a bi-pole pot magnet |
||||
 |
Bi-pole pot magnets can be attached to non-ferromagnetic materials with the help of glue, to create a jig or fixture, for example. To attach the bi-pole pot magnet to a non-ferromagnetic material you will need to do the following: | |||
Equipment required: |
||||
 |
|
|||
 |
||||
 |
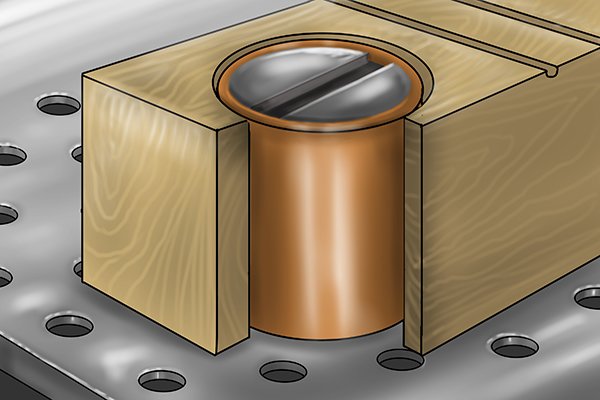
Step 1 – Drill holeUse the cordless drill driver with the forstner drill bit attached to drill a flat-bottomed hole into a piece of non-ferromagnetic material, (e.g. wood). The forstner drill bit will produce a hole of a consistent depth with smooth sides, which is ideal to insert the bi-pole pot magnet into. |
|||
 |
A flat drill bit may also be used for this task, however it will not leave as neat a hole as the forstner drill bit due to its sharp pointed end. | |||
 |
Step 2 – Apply glueApply glue to the bottom of the bi-pole magnet. |
|||
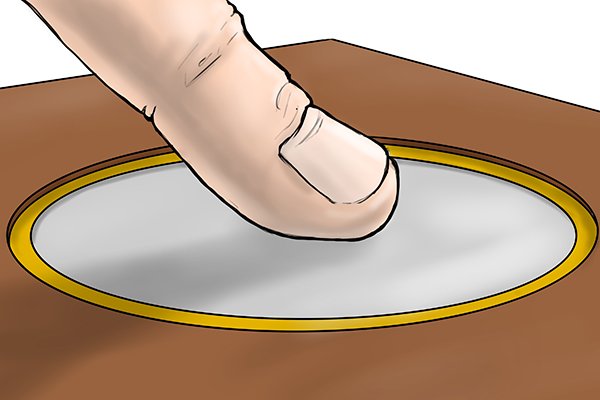 |
Step 3 – Insert magnetClear the hole of any wood chippings and insert the bi-pole pot magnet with the magnetic face pointing upwards. Hold the magnet in place for 2-3 minutes until a secure hold between the glue and the non-ferromagnetic material is achieved. |
|||
