


How to use line blocks?
How to use line blocks |
||||
|
|
||||
 |
Step 1 – Build cornersWhen you’re building a brick wall, always start with your corners. These will help lead the rest of the wall when you start laying the courses in between. Use a spirit level to make sure your corners are straight and level. These are known as “corner leads”. |
|||
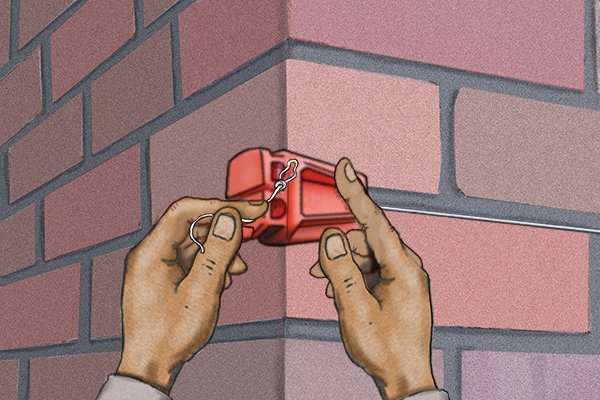 |
Step 2 – Secure brick lineTie a knot in the end of your brick line and feed it through the groove in your line block until the knot snags and the line is secure. |
|||
 |
Step 3 – Position line blockPosition the line block to the corner leads of the wall. As the line runs through the centre of the line block, you will need to position it accordingly. |
|||
 |
Step 4 – Pull the line tautHave someone hold the line block in position. Then pull the line out and, while keeping it taut and horizontal, run it to the opposing corner lead of your wall. |
|||
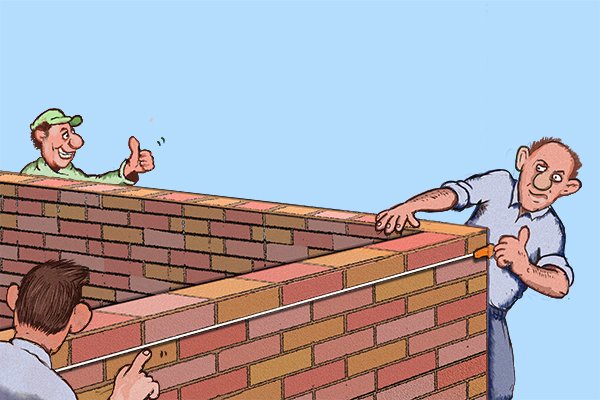 |
Step 5 – Anchor lineOnce the line has reached the opposite corner lead, attach it to another line block by slipping it into the groove and until it is secure. The line must remain taut across the length of your brick course. Any excess brick line not being used can be left loose or, if you want to reduce trip hazards, you could wrap the excess around the body of the line block. |
|||
 |
Step 6 – Check line is levelYou may want to check that your blocks and line are level at this point. Attach a line level to your brick line and adjust the blocks if necessary. |
|||
 |
Step 7 – Start layingNow your blocks and line are in place you can start laying your bricks. |
|||
 |
Step 8 – Raise blocksOnce you have finished laying that course of bricks, move your blocks and line up a level and start laying the next course. |
|||
 |
||||
