


How to replace the shaft of a fork?
How to replace the shaft of a fork |
||||
 |
The following guide aims to provide help with changing a loose, worn or broken shaft without causing damage to your new shaft, your tools or yourself!
Replacing a shaft may take time but it will certainly save you money. Purchase a replacement shaft for your fork and you have the perfect excuse to work on your DIY skills. |
|||
 |
If the old shaft is just rough to the touch then repair it with waterproof tape to give you a stronger grip as well as protection against wear and tear. Replace the shaft, however, if it is splintered, broken or loose.
This guide applies to both wood and fibreglass shafts. For a broken steel shaft, it is recommended that the fork is replaced entirely. |
|||
 |
Ensure you buy the correct replacement shaft for the fork head: Some have grooves (or threads) where you simply unscrew the shaft from the socket then screw the replacement back in until it can no longer turn.
Don’t twist too hard or you could break one of the threads – Your fork is ready to go. |
|||
 |
Other shafts, however, have smooth tapered ends and are riveted in place. The process of replacing this type of shaft isn’t quite as straightforward as a screw-in handle but the end result is usually longer lasting. | |||
Remove the broken shaft |
||||
 |
Step 1 – Clamp fork headUse a bench vise to clamp the head of the fork or ask someone to hold it for you. Both the socket and the broken shaft should point outwards. Place it horizontally on the ground and put a foot firmly, but without applying too much pressure on the socket, (the sleeve where the tines meet the shaft) to anchor the fork. |
|||
 |
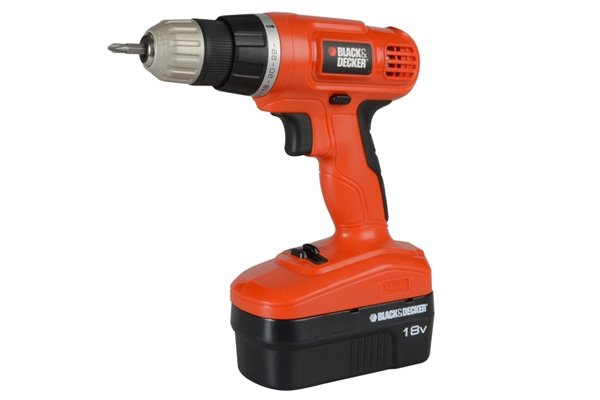
Step 2 – Remove screw from old shaftUse a drill to remove the screw that secures the old shaft in the socket of the tines. |
|||
 |
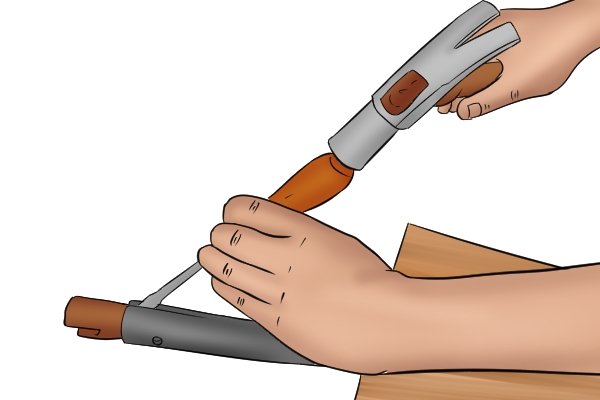
Alternatively, if it is a rivet, use a pair of pincers.
Clamp the edge of the pincers’ jaws onto the head of the rivet and prise it out. This may involve a lot of twisting and turning! |
|||
 |
Step 3 – Remove remainder of shaft from socketFor stubborn pieces that refuse to come out, drill one or two 6.35mm (1/4 inch) hole(s) in the wood to help loosen it. |
|||
 |
Secure the fork with the socket pointing downwards. Using a hammer and a screwdriver or chisel, ease the lodged piece out of the socket.
Once this is removed, remove any debris and clean the socket. |
|||
Test the new shaft for size |
||||
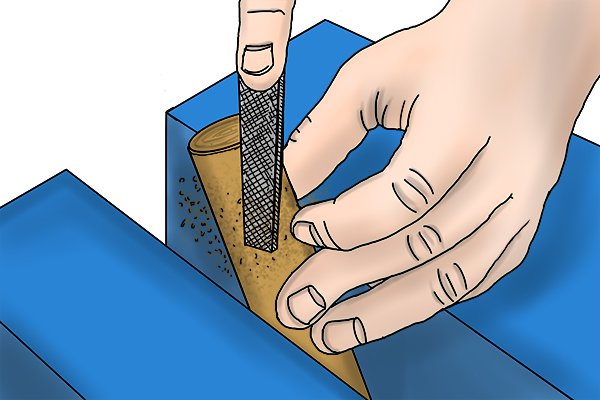 |
Step 4 – Insert new shaftInsert the new shaft, tapered end first and try it for size. Take your time as you only have one chance to drive the shaft in. Some replacement shafts that are secured with a rivet may not be a perfect fit and will probably be too large. If this is the case, use a wood rasp or file to shave down the shaft until it fits. |
|||
 |
The top of the shaft should be tapered gradually to drive into the socket later; use the original shape of your new shaft as a guide.
Try the handle for size between each filing then sand to a smooth finish. |
|||
Insert the shaft |
||||
 |
Step 5 – Fit new shaftOnce you are happy with the size of the shaft, slide it into the socket as far as it will go. To drive the shaft into the socket, hold the fork upright and give it a few gentle raps on the ground. |
|||
 |
If you are using a wooden shaft, don’t force it in as this may split the wood.
Examine the direction of the grain before fastening the shaft in place – see step 6. |
|||
 |
Step 6 – Align grainCheck that the direction of the grain (or fibres) of the wood run along the length of the shaft. Ensure that any oval rings are at the side of the shaft – in relation to the tines – as you slide it into the socket. If the rings are on the top surface or the underside of the shaft then it is much more likely to break when pressure is applied. Now secure the shaft in place using a rivet or screw. |
|||
 |
Rivet or screw?A screw will more than likely need to be tightened from time to time. If you don’t keep an eye on this, the fork’s head will become too loose and may break off completely. Although a screw is easier and faster to use, a rivet is a more permanent fastener. |
|||
 |
If attaching the shaft with a rivet…Using a 3.17mm (1/8 inch) bit, drill a pilot hole (a starter hole to allow for the insertion of another drill bit or screw) through the hole of the socket of the tines and into the shaft. Next, use a bit that is the same diameter (width) of the rivet to make the hole larger. This is where your rivet will go. Finally, insert a rivet sleeve through the hole, position your rivet pin and secure with a rivet gun. |
|||
 |
If attaching the shaft with a screw…Drill a 3.17mm (1/8-inch) pilot hole about 6.35mm (1/4 inch) in through the hole in the socket of the blade. Position a 4 x 30mm (8 x 3/8 inch) screw into the pilot hole and tighten. |
|||
 |
||||
