


How to use a wheel wrench?
How to use a wheel wrench |
||||
|
|
||||
 |
Step 1 – Raise vehicleTo use a wheel wrench to remove a wheel or replace wheel nuts, you will need to use a jack to raise the vehicle. |
|||
 |
For more information, see our guide to: Car and trolley jacks | |||
 |
Step 2 – Measure wheel nutTo help choose the correct sized socket for your vehicle’s wheel nuts, you need to know the diameter of one wheel nut. To find out the diameter of a wheel nut, measure across the flats of the nut using measuring tape. Whatever the measurement of the wheel nut, (e.g.19mm), the socket’s hexagonal recess will need to match it. |
|||
 |
Another alternative is if you do already own a set of sockets you can simply place different sized (diameter) sockets onto a wheel nut to see which one fits. The socket should fit securely around the wheel nut without any movement. | |||
 |
||||
 |
Adjusting the shaftTo extend the shaft, hold the drive-end of the wheel wrench in one hand, then pull the handle so that the shaft extends. Once the shaft is fully extended, twist the handle in an anti-clockwise direction to lock in place. |
|||
 |
To close the shaft, twist the handle in a clockwise direction then push the handle towards the drive-end of the wrench to retract the shaft. | |||
 |
Step 3 – Locking wheel nutA number of vehicles come with a locking wheel nut that requires a wheel lock key to loosen one of the four/five wheel nuts on each wheel. The blue circled nuts in the picture are wheel nuts and the one that is circled in red is the locking wheel nut. Jump to step 5 if your wheels do not have wheel locking nuts. |
|||
 |
If your wheels contain locking nuts, then attach the wheel lock key to the end of the wrench. To do this, line up the wrench’s square drive with the wheel lock key’s drive, then push onto the wrench. This will lock the key in place, ready to loosen the locking nut. | |||
 |
Step 4 – Loosen locking nutPlace the key onto the matching wheel nut then start to loosen it by turning the wrench anti-clockwise. Once this nut is removed, set it aside in a safe place. |
|||
 |
Step 5 – Remove wheel nutsSome vehicles do not contain a locking wheel nut and just have regular wheel nuts. If this is the case, just use the correct diameter socket to remove the wheel nuts. |
|||
 |
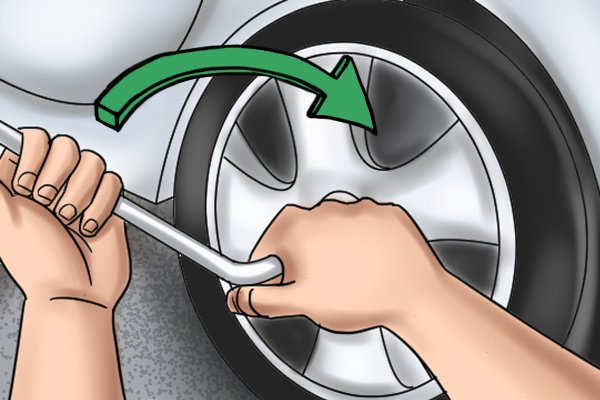
Place the socket onto each nut and turn anti-clockwise to loosen. Place all the wheel nuts in a safe place to avoid losing any. | |||
 |
Step 6 – Remove wheelEither remove the wheel by pulling, or replace the wheel nuts with new ones. |
|||
 |
Step 7 – Replace wheel nutsTo replace the wheel nuts, simply place each nut back into the correct position making sure they sit comfortably. To tighten the wheel nuts, use the same socket and turn each nut clockwise. |
|||
 |
Step 8 – Replace locking nutOnce the wheel nuts are tight and the wheel is secure, place the wheel nut that requires the locking key into its correct place. Place the locking key onto the wrench and turn the nut clockwise to tighten. |
|||
