Our other sites:

Introduction To DeWalt String Trimmers

Introduction to DeWalt String Trimmers

Dewalt strimmer in use.

Also known as strimmers or grass trimmers, these versatile power tools make it easy to tidy up your garden and keep it looking good. Most of them work using a thin nylon line that whips around at high speed to chop off stems.


You can use them for tasks such as cutting grass and weeds, making neat edges along borders and fences, and removing ivy from walls. String trimmers are particularly useful in restricted places where a lawnmower can’t reach, and for trimming around trees and borders.

What to look for in a String Trimmer?

Dewalt strimmer in use.

The following features are particularly useful in a grass strimmer:

Speed Control


Brushless Motor


Bump Feed


Ergonomic Design


Powerful Battery

Speed Control

Variable speed makes the string trimmer very versatile.

The ability to precisely control the speed of a strimmer makes it much more versatile, as you can adjust the rate to suit the task at hand. The DeWalt DCM651 has two speeds as well as a lever which lets you lock the speed at any time, so you don’t have to continually keep the trigger pressed in.


You can use the strimmer on the slower setting for longer run time and when undertaking delicate work such as edging flower beds, and on the fast setting to tackle large weeds or long grass.


For complete flexibility, there is also a variable speed trigger which you can press at any time to increase or reduce the cutting rate.

Brushless Motor

Hammer drill driver brushless motor showing windings.

A brushless motor is far superior to one with brushes as it works using contactless magnetic sensors. This vastly reduces friction, heat and noise, resulting in a cooler, stronger and more efficient motor which will adjust its power to the needs of each task.


The tool can be made lighter and more compact, as no brush housing is required. Run time is also greatly increased.

Bump Feed

Using Dewalt grass trimmer.

With most trimmers, you can control the line feed by bumping the cutting head on the ground to release new string as it becomes used up. When trimming tough weeds, remember to feed out more line at regular intervals to avoid it being chopped too short and retracting back inside the head.


An integral cutting knife at the edge of the strimmer guard keeps the line the right length. It also stops it hitting or extending beyond the guard, which could create a hazard by slowing down the motor or even making it stall.


Keep the knife nice and sharp, otherwise it won’t cut the line. If the blade seems blunt you can use a metal file, sharpening stone or angle grinder to bring the edge back to full sharpness.

Ergonomic Design

Cutting widths vary between string trimmers.

A well-balanced, compact and lightweight body makes the trimmer straightforward to manoeuvre, giving you maximum control.


Another useful feature to have is a good-sized padded handle with rubber overmould. As you will probably be gripping it quite hard, it’s important to have a comfortable design.


As for cutting width, the larger the diameter, the quicker you will be able to slice through those weeds. Most strimmers range between 22cm and 45cm. At 33cm, DeWalt’s strimmer has quite a wide reach but is less bulky than trimmers with cutting widths at the top end of the scale.

Powerful Battery

Strimming with Dewalt grass trimmer.

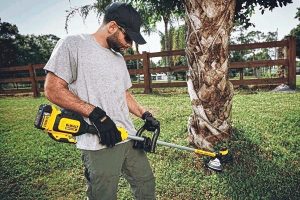
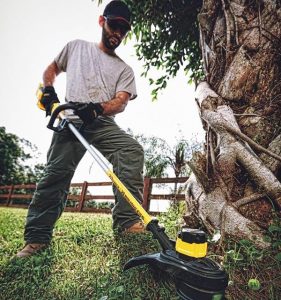
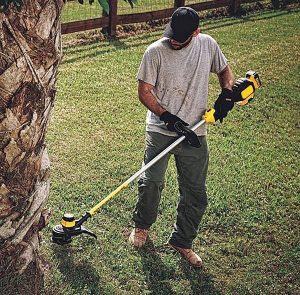
Grass trimmers have been in common use for a long time, but the development of Lithium-ion technology has made cordless versions much more popular.


Lightweight yet powerful, these batteries offer long run time and are extremely convenient. There are no unpleasant petrol fumes, no start cord to worry about, and no need for maintenance – just insert the battery pack, press a button and you can start work straight away.


What’s more, the batteries are interchangeable with those of other DeWalt power tools, so you can mix and match for extra flexibility.

Tips on using a Strimmer

  1. Wait for a dry day to get the blower out. Wet leaves will be much heavier and more difficult to shift. Rain could also harm your machine, as well as increasing the risk of electric shock.
  2. Avoid using the blower in breezy weather unless the wind happens to be blowing from behind you, in the same direction that you’re aiming for – although even then, you may encounter problems getting the leaves into a pile.
  3. Before you begin the job, plan where you want the leaves to finish up. Placing a plastic sheet or tarpaulin in the designated spot will make disposing of the leaves much quicker and easier. Anchor the sheet at intervals with bricks or large stones.
  4. Wear safety glasses, as blowers can throw up large amounts of dust and debris. Earplugs or ear defenders are also a good idea, particularly if you’re intending to work for an extended period of time.
  5. When you’re ready to start, hold the blower pointing downwards at a slight angle just above the ground and walk slowly forward. It’s tempting to sweep the machine from side to side, but this will only serve to scatter the leaves untidily. Instead, use a smooth back and forth movement to propel the leaves away from you. Work methodically, moving in one direction only. This will prevent you blowing leaves into parts of the garden that you’ve already cleared.
  6. If you find controlling the direction of the leaves difficult, practice blowing them against a wall or fence first, which is easier than trying to arrange them in a pile out in the open.
  7. Be extra careful when using the blower around delicate shrubs or flowers. Even with the speed turned down low, you could do serious damage if you go too close.
  8. When clearing a drive or pathway next to a lawn, you might find it more convenient to blow the leaves on to the grass and go over it with a lawnmower. This will partly shred the leaves and collect most of them in the grass box, then you can remove the last few using a rake.
  9. Disposing of the leaves afterwards is simple if you’ve been using a tarpaulin – just fold up the four corners to enclose the pile of leaves and drag it over to your compost heap or bin. A more time-consuming method is to pick up the leaves with two pieces of board before dropping them into garden sacks or a portable bin.

Wonkee Donkee Tools
Logo