


How to change the blade on a hand mitre saw?
How to change the blade on a
|
||||
| Please note: How this is done may vary depending on the make and model. One method is shown below: | ||||
 |
||||
How is the blade attached? |
||||
 |
On either end of a hand mitre blade is a small hole. These hook over two corresponding pins at the base of the frame’s arms.
To cut efficiently, the blade must be stretched taut in the frame to prevent it bending as it moves through the material. The tension rod at the top of the hand mitre frame controls how tightly the frame’s arms stretch the blade. This can be adjusted using the wing nut at the end. |
|||
Removing the blade |
||||

|
Step 1 – Lift saw out of frameRemove the saw from the frame by sliding it up and out of the guide rods. |
|||
 |
Step 2 – Set frame asideOnce the saw has been removed, set aside the frame in a safe place. |
|||
 |
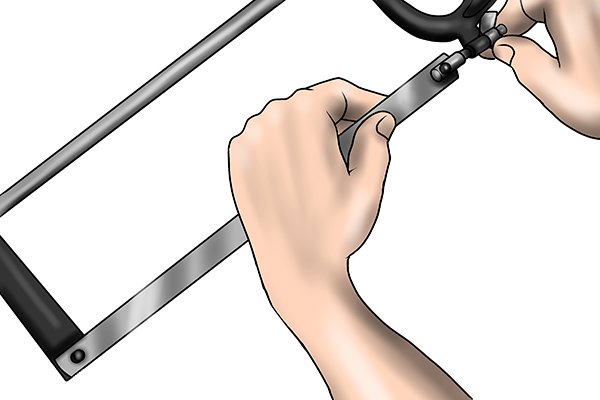
Step 3 – Turn wingnut anti-clockwiseLocate the wing nut on the end of the tension rod and turn it in an anti-clockwise direction. This will cause the frame’s arms to slacken, and move inwards slightly, allowing you to unhook the blade from the pins at their base. |
|||
Inserting the blade |
||||
 |
Step 1 – Loosen wingnutEnsure the wing nut has been loosened by turning it in an anti-clockwise direction. |
|||
 |
The teeth on most hand mitre saw blades have three angled cutting edges instead of just two.
Not only does this allow for faster cutting, it also means the saw can cut on both the push and the pull stroke. |
|||
 |
These types of teeth are angled slightly, so ensure you place the blade in the frame so that the teeth are pointing back towards the handle of the saw. | |||
|
Step 2 – Hook blade onto pinsHook the blade onto the pins and tighten the wingnut by turning it in a clockwise direction. Step 3 – Do a few practice strokesBefore sawing, do a few practise strokes without material to ensure the blade does not move around on the pins or wobble in the frame. |
|||
